
このページは、MicrosoftのMSALチュートリアルページについて、自分が読みながら行った際に、なかなか分かりにくかったところもありましたので、なるべく丁寧に記載しています。
Microsoftのチュートリアルページはこちらです。
https://learn.microsoft.com/ja-jp/entra/identity-platform/tutorial-v2-ios
このチュートリアルの内容をxcodeとM365 Entra IDで作る内容です。
完成するとアプリからMicrosoftへの認証が行われ、ログインした状態となります。私の場合は、検証に使用しているiPhoneにMicrosoftのAuthenticatorが入っているので、Authenticatorにて認証が行われています。Authenticatorが入っていない場合は、ログインのウィンドウが表示され、ユーザー名、パスワードを入力する認証になります。
「Call Microsoft Graph API」を押します。
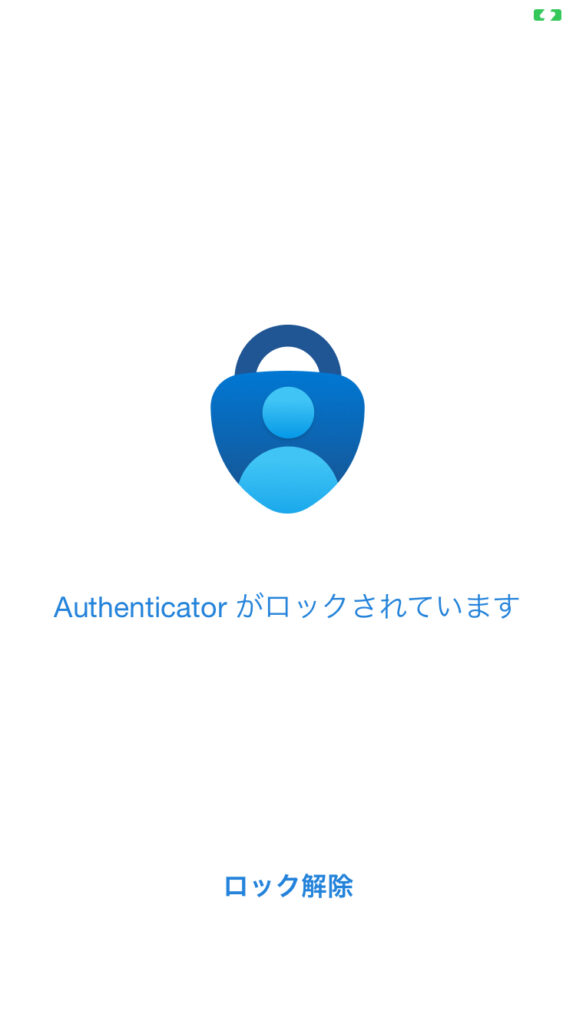
「ロック解除」を選択します。
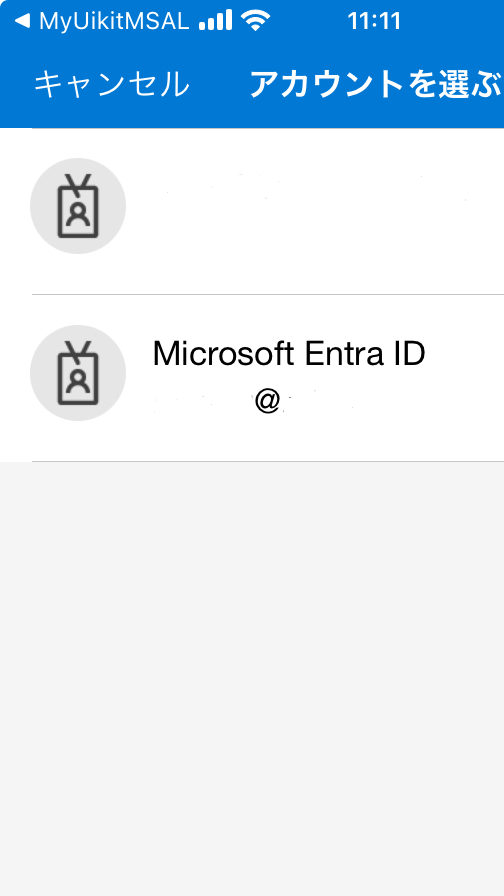
認証を行うEntra IDテナントを選択します。
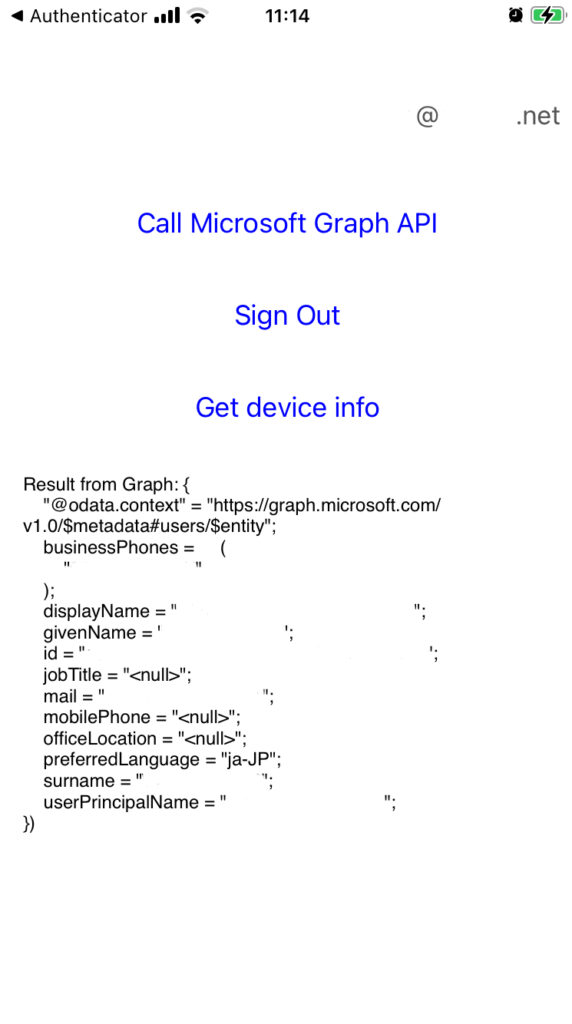
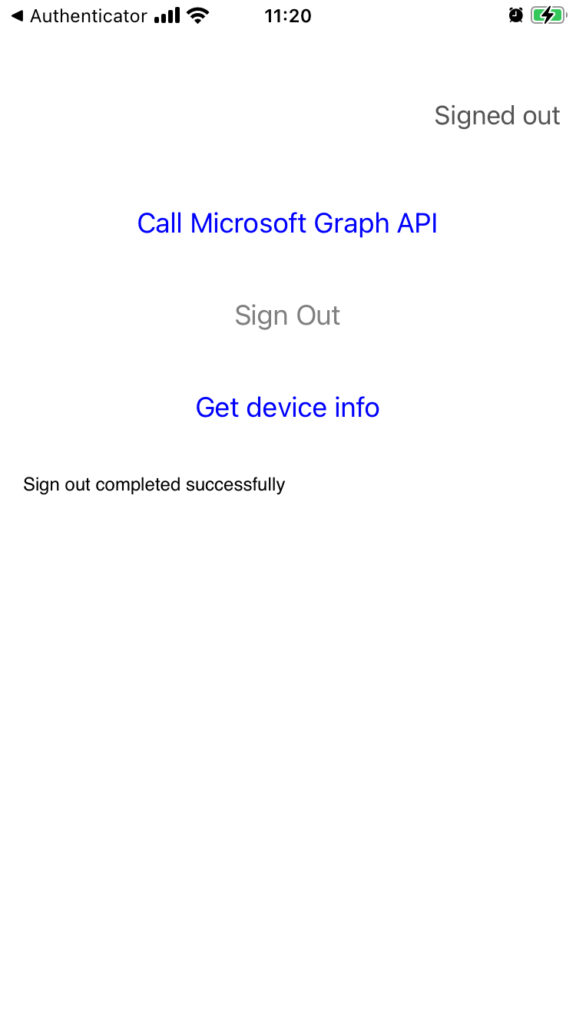
ログインに成功すると、このような画面になり、ログインしているユーザー情報が表示されます。
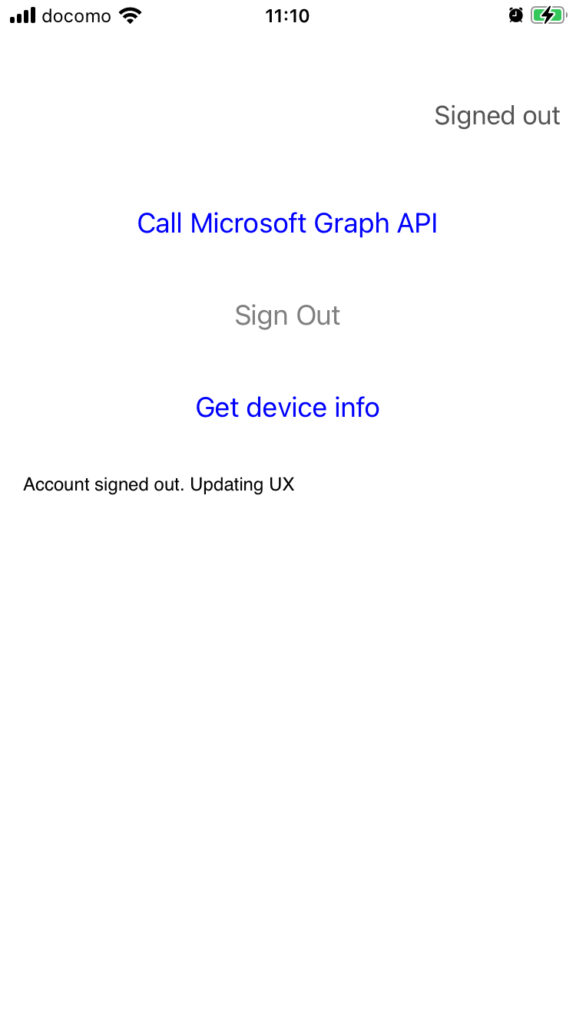
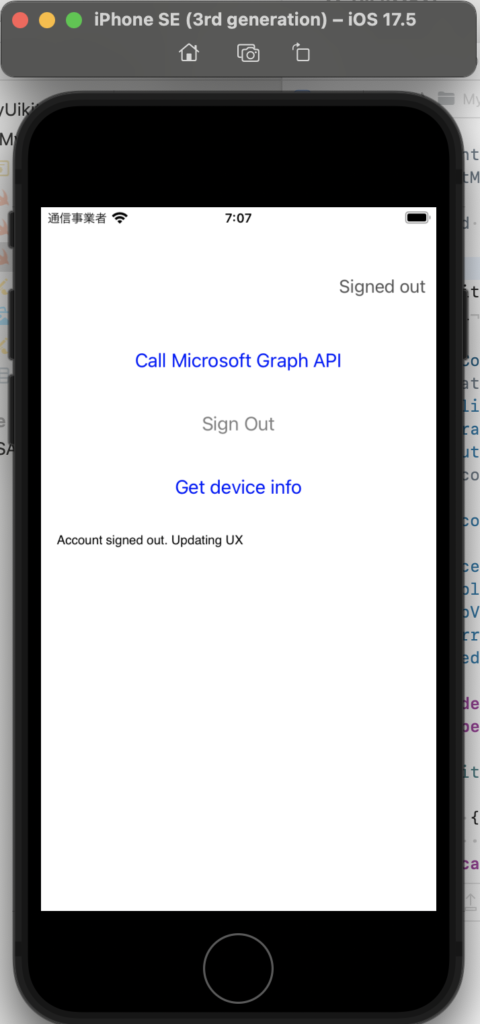
サインアウトをすると次のような画面になります。
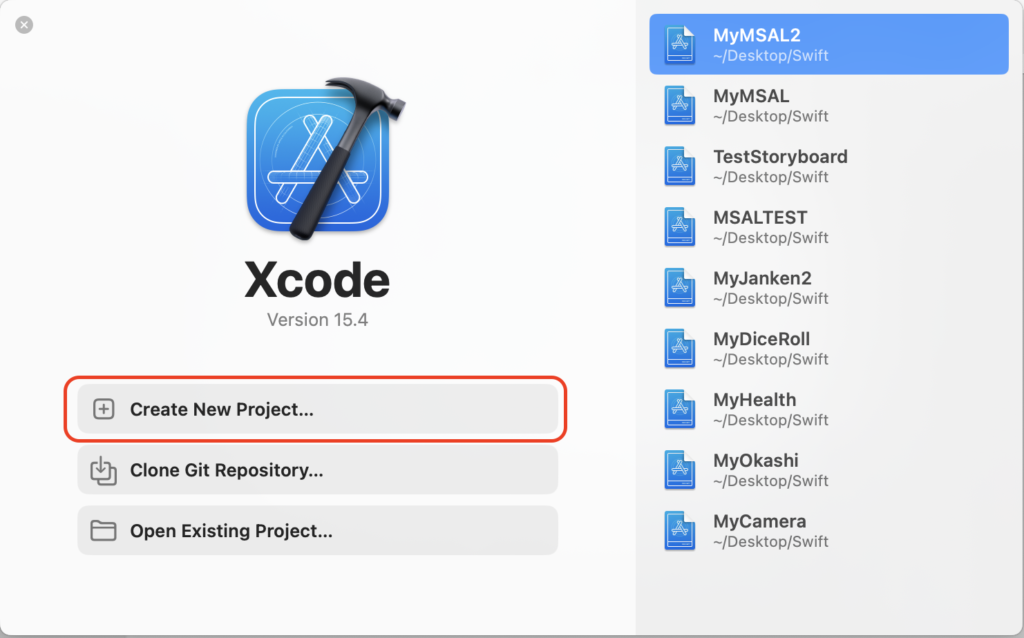
Xcodeのプロジェクトを作成します。
「Create New Project」を選択します。
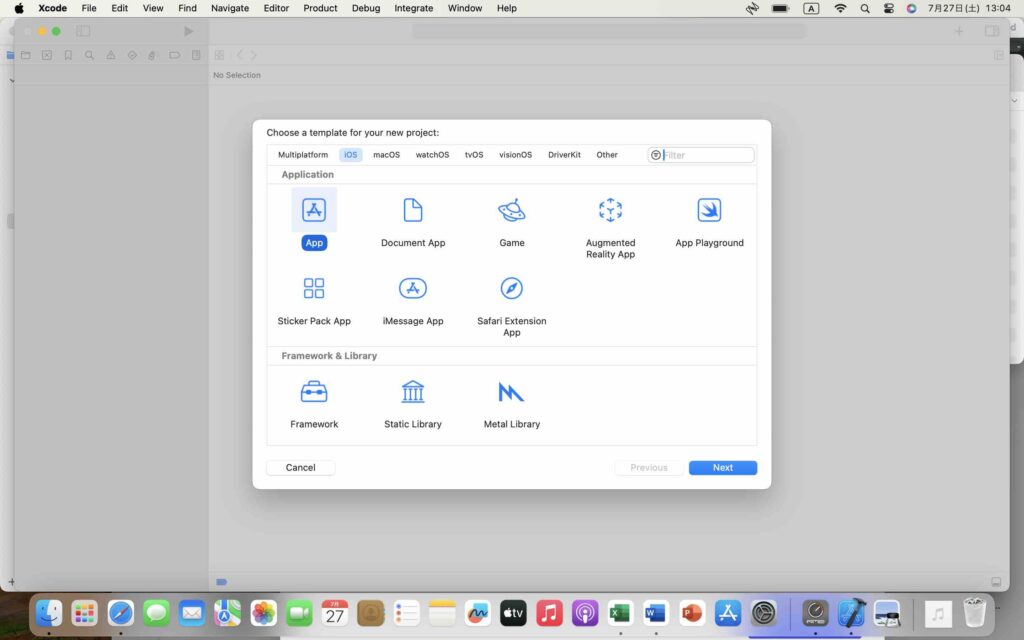
「App」を選択して、「Next」をクリックします。
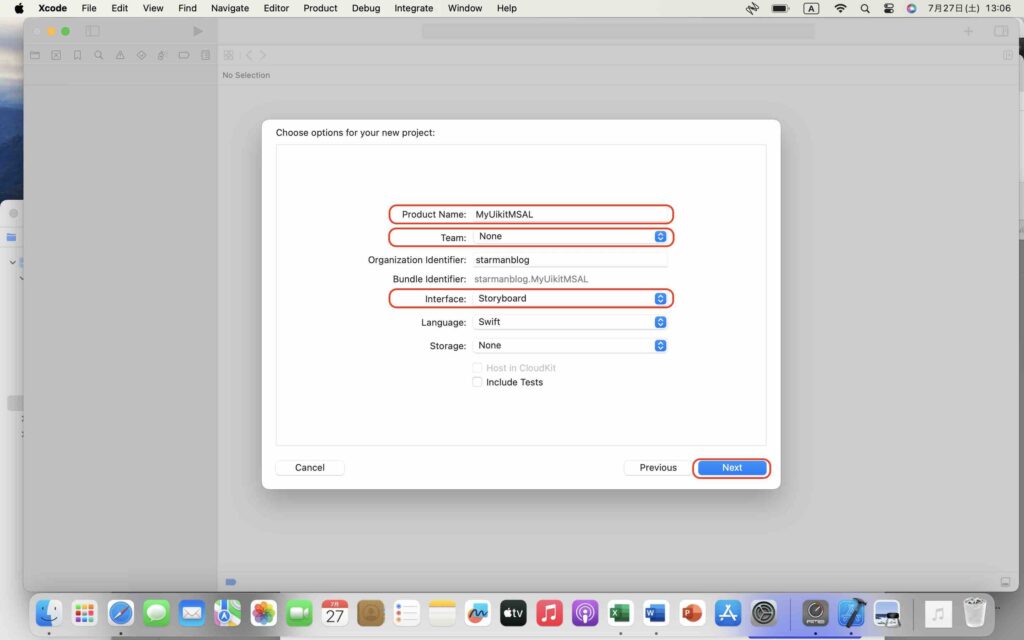
Product Nameに作成するアプリ名を入れます。私は、「MyUikitMSAL」としました。
Teamは、ご自分のTeamを選択してください。Interfaceに「Storyboard」を選択し、「Next」をクリックします。
アプリケーションを格納するフォルダを選択して、「Create」をクリックします。
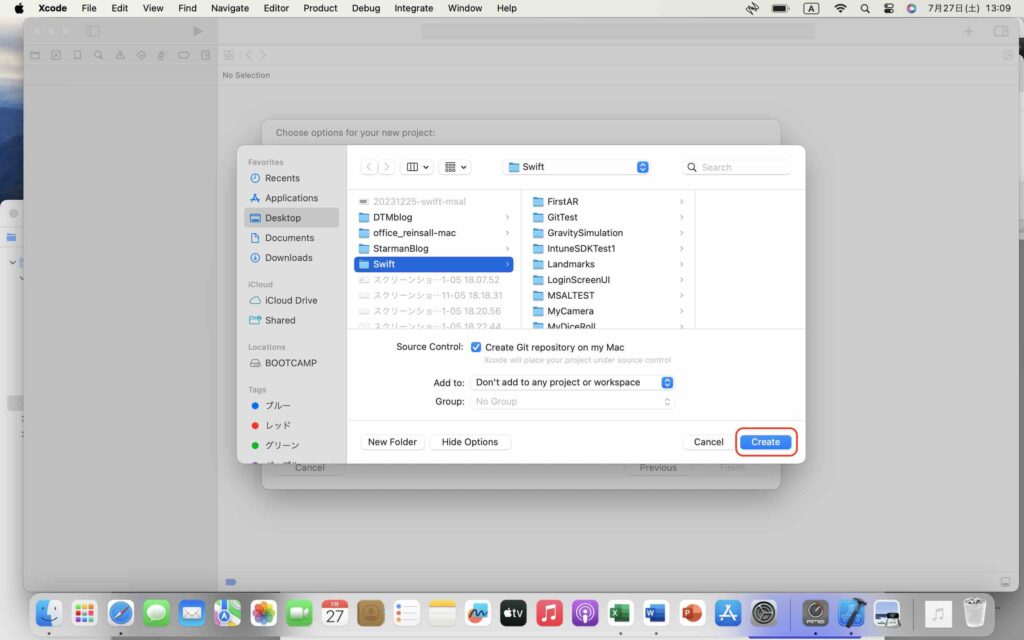
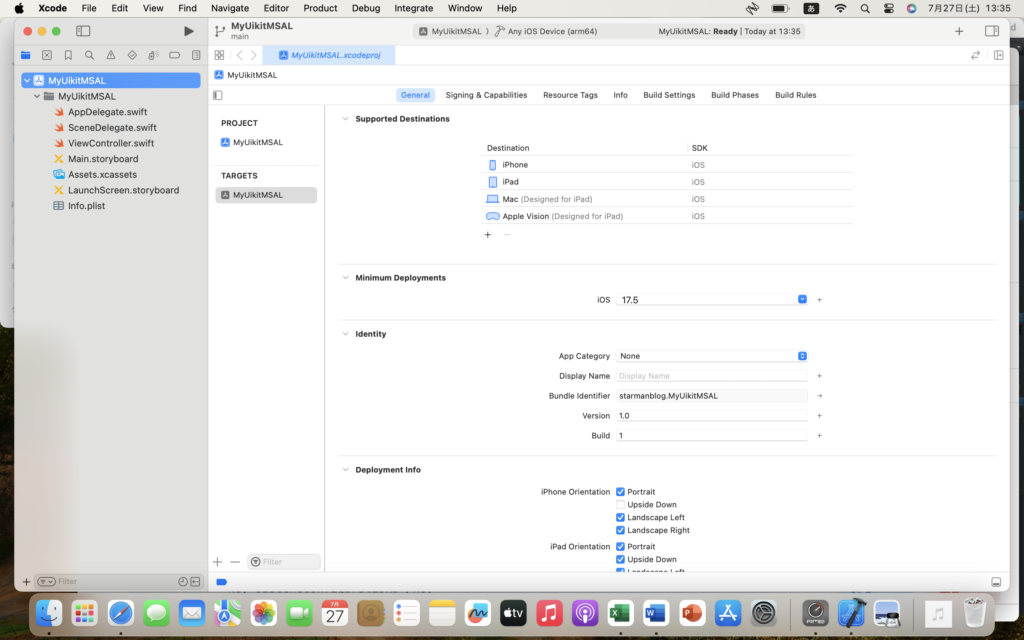
プロジェクトが作成されました。
Safariを立ち上げます。
プライベートモードでウィンドウを開きます。
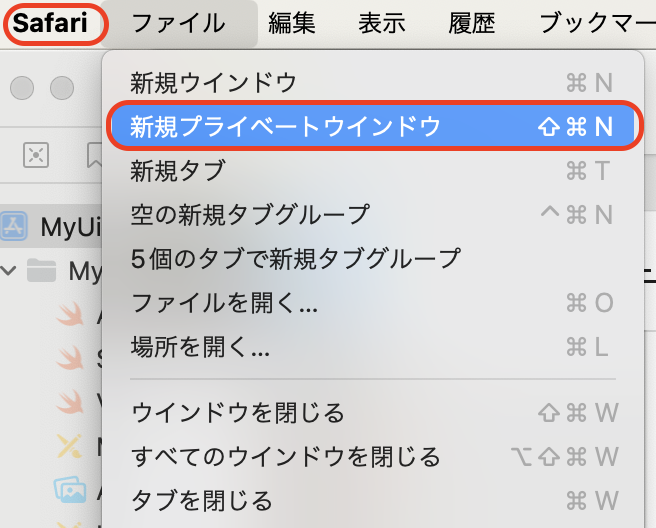
通常モードでウィンドウを開いても構いません。会社と自宅など、複数のM365アカウントをお使いの場合、ブラウザがどちらの環境かをうまく認識しないことがあります。
その場合には、プライベートモードでウィンドウを開くと、アカウント情報が参照されず、クリアな状態となりますので、お試しください。
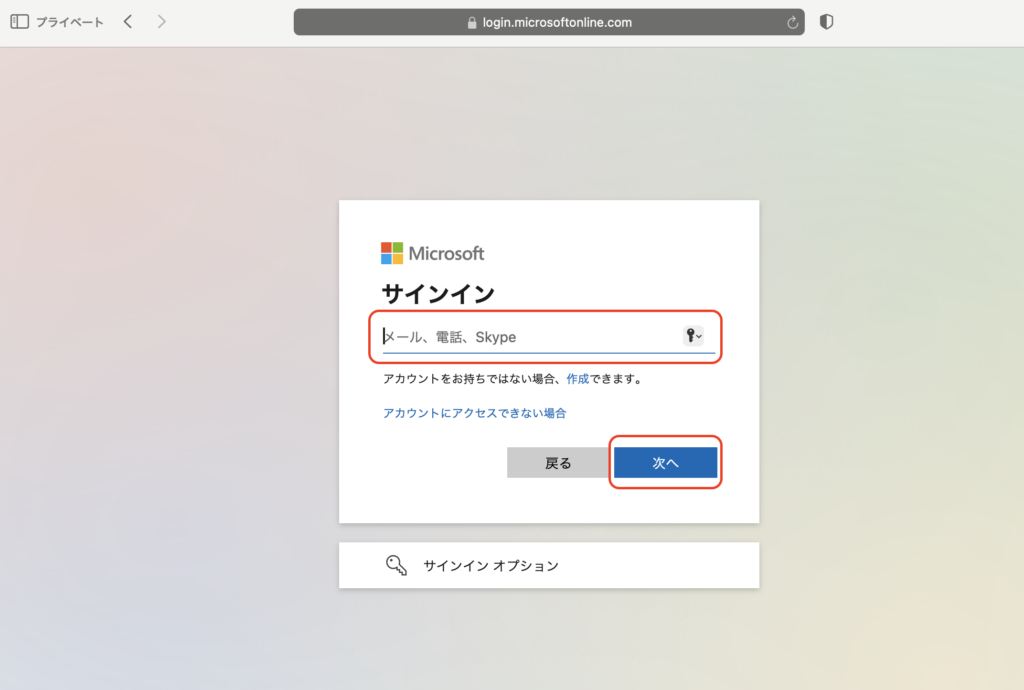
URLに「portal.office.com」を入力し、ページを開きます。
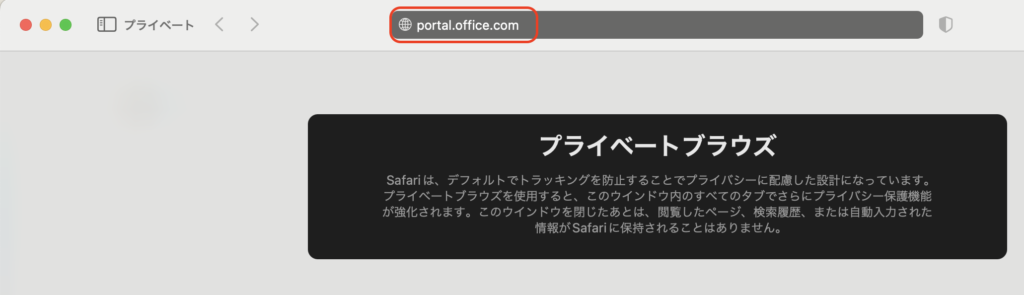
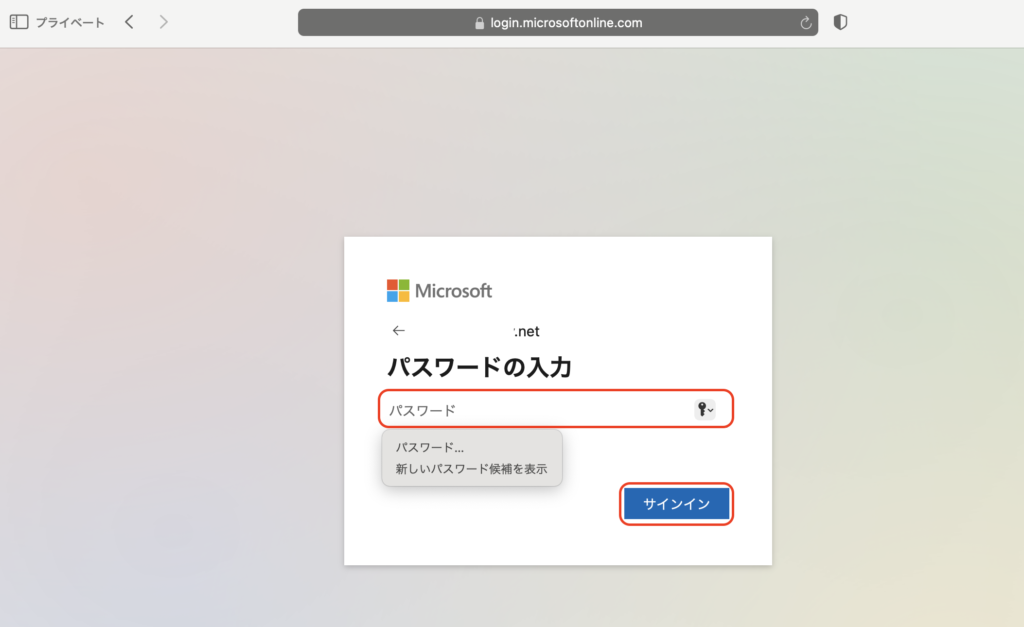
ユーザー名、パスワードを入力し、サインインします。
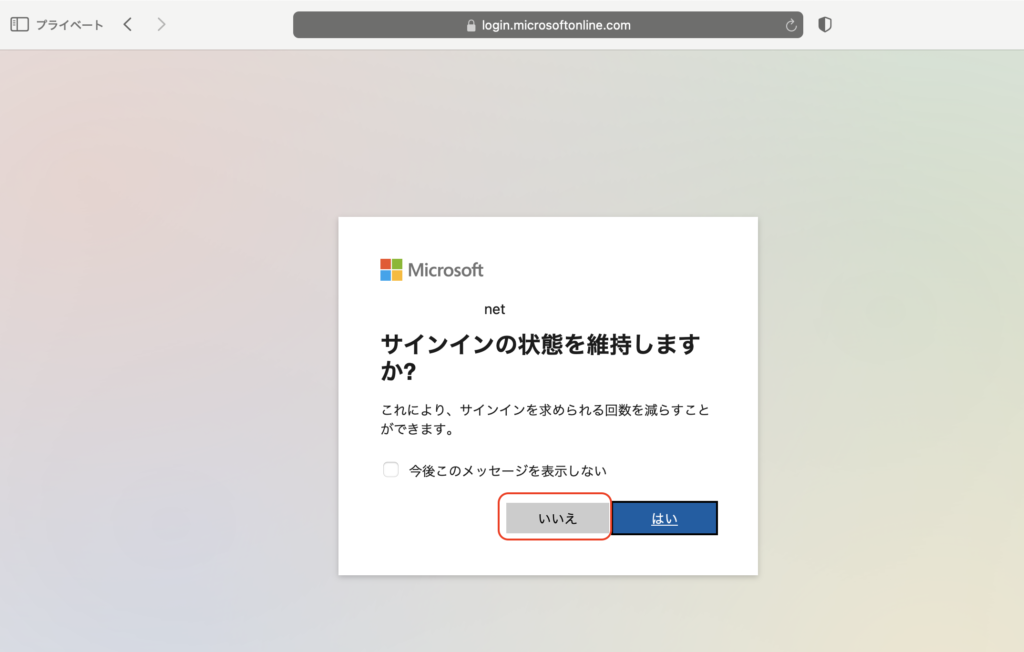
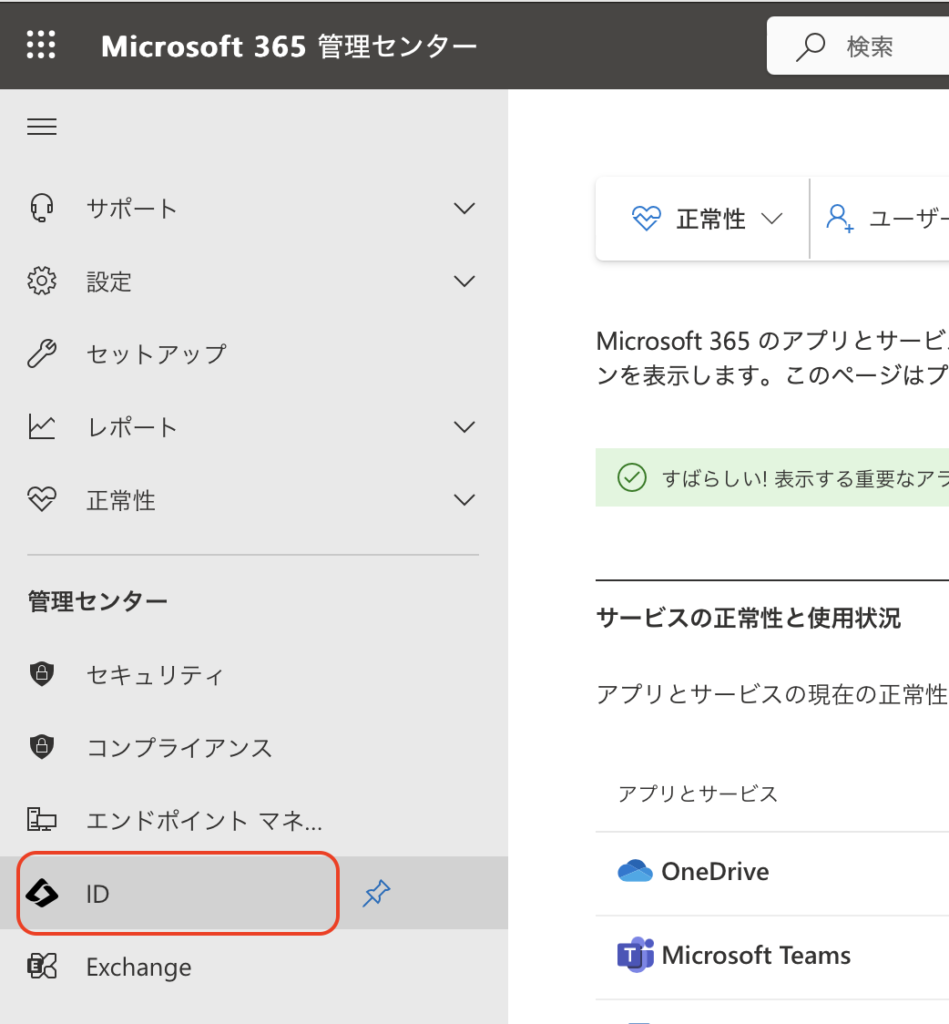
M365にサインインができたら、管理センターを開きます。
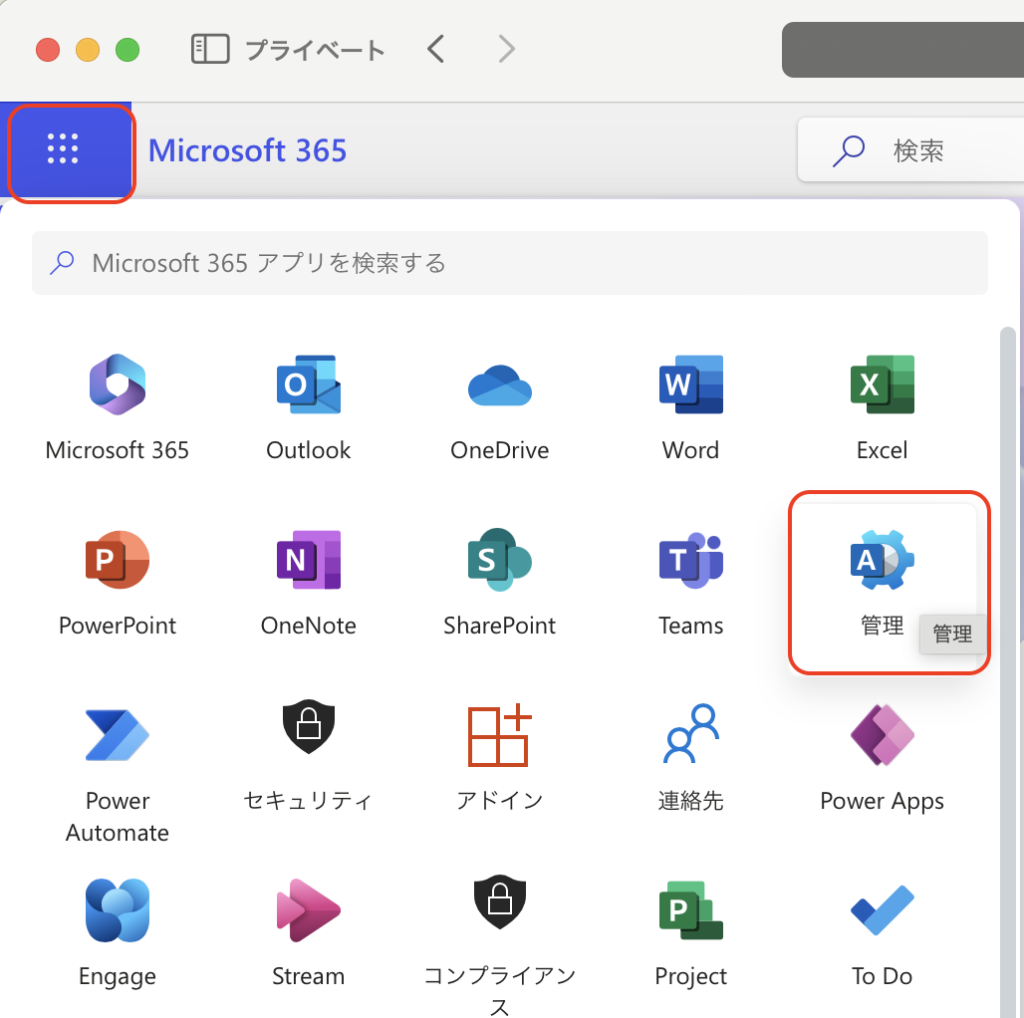
管理センターのメニューから「ID」をクリックします。
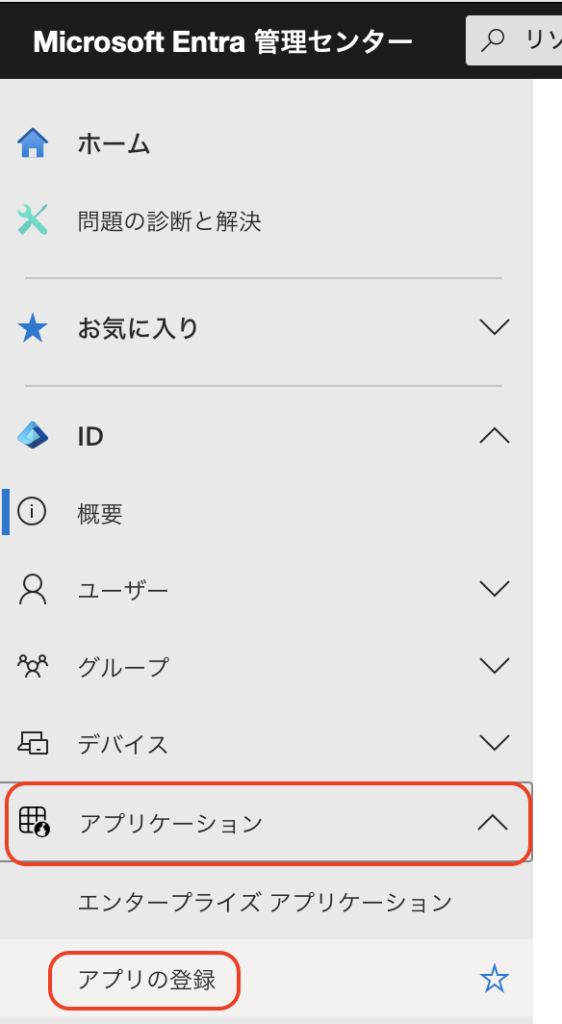
Entra管理センターのメニューから、アプリケーションを選択し、「アプリの登録」をクリックします。
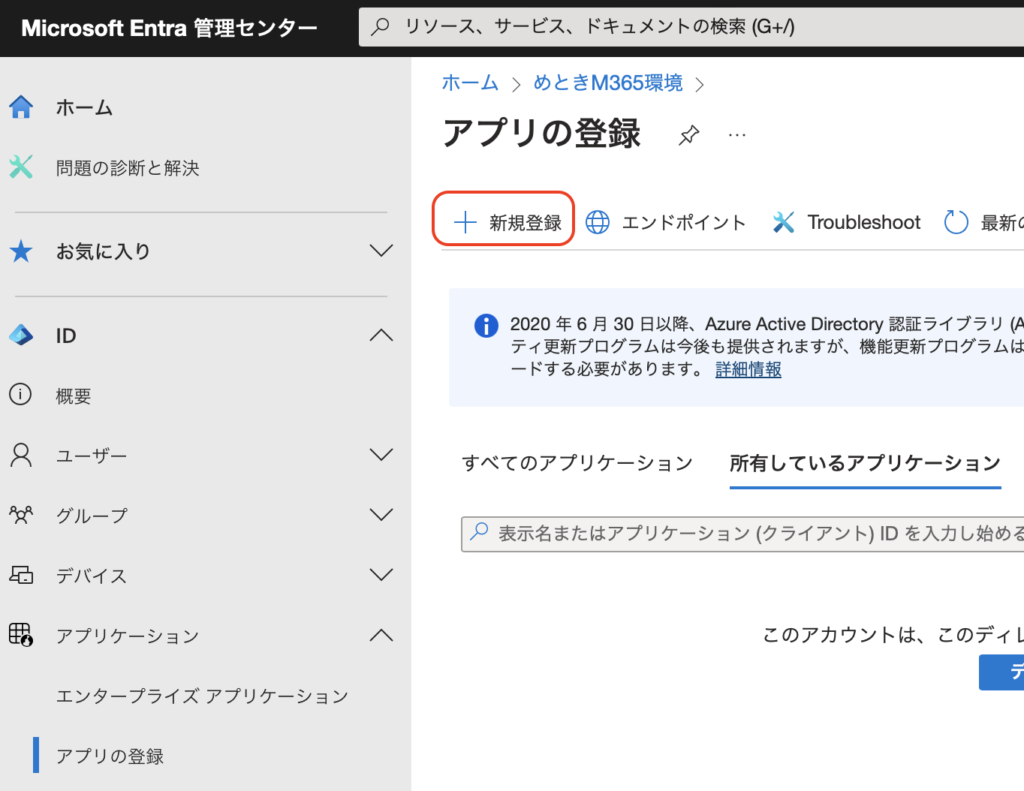
「新規登録」をクリックします。
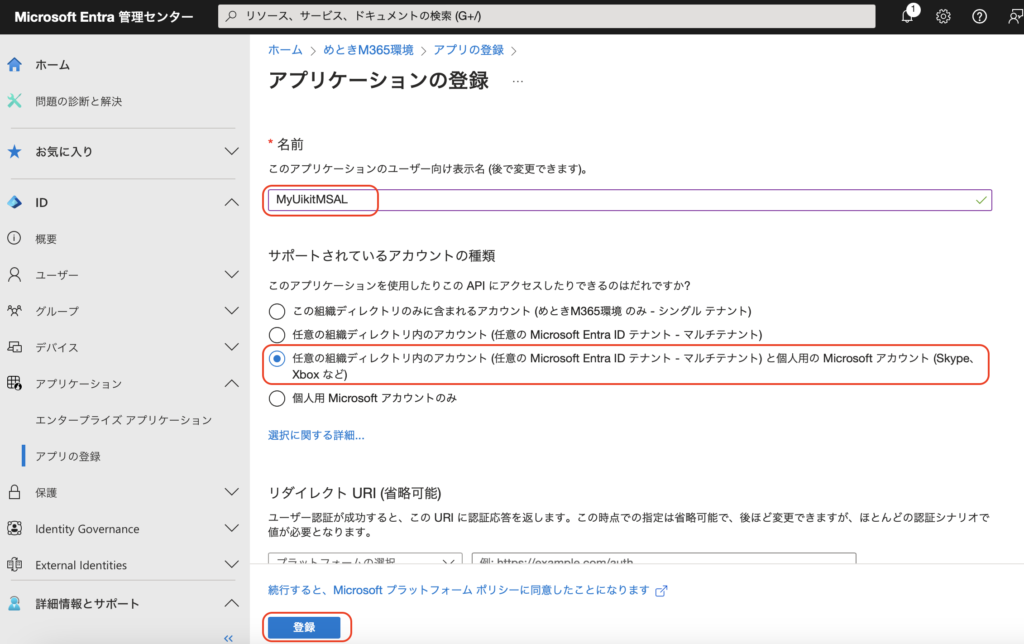
アプリケーションの名前を入力します。この記事と同じように作る場合は、「MyUikitMSAL」を入力してください。
サポートされているアカウントの種類に、「任意の組織ディレクトリ内のアカウント(任意のMicrosoft Entra ID テナント – マルチテナント)と個人用のMicrosoftアカウント(Skype、Xboxなど)」を選択します。
「登録」をクリックします。
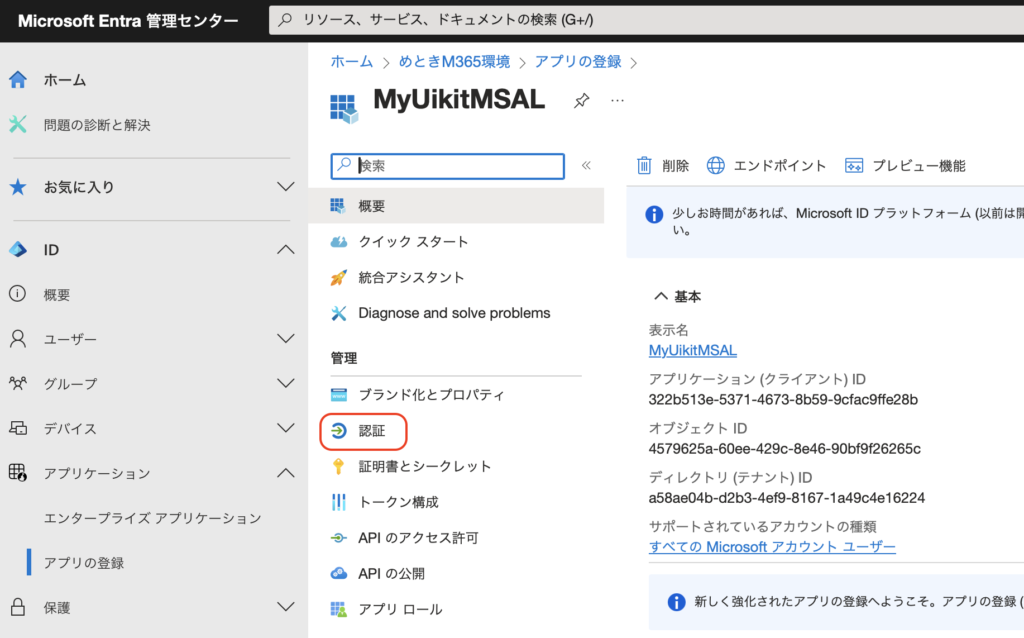
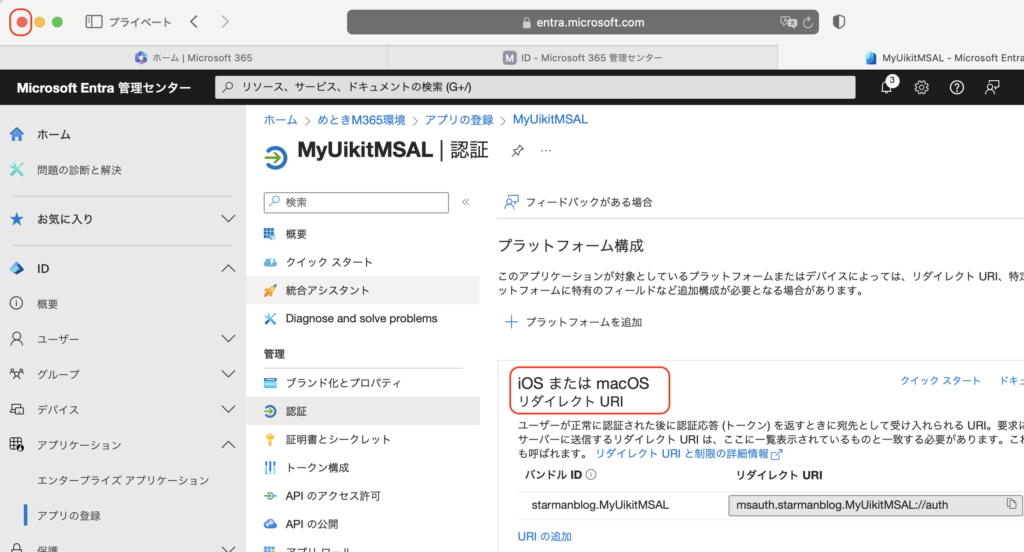
続いてプラットフォームの追加を行います。「認証」をクリックします。
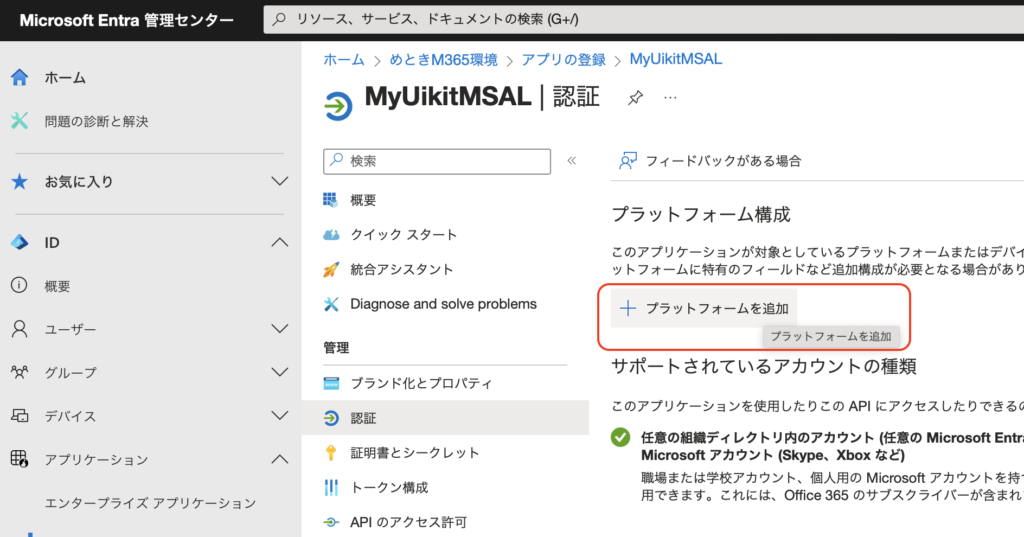
「プラットフォームを追加」をクリックします。
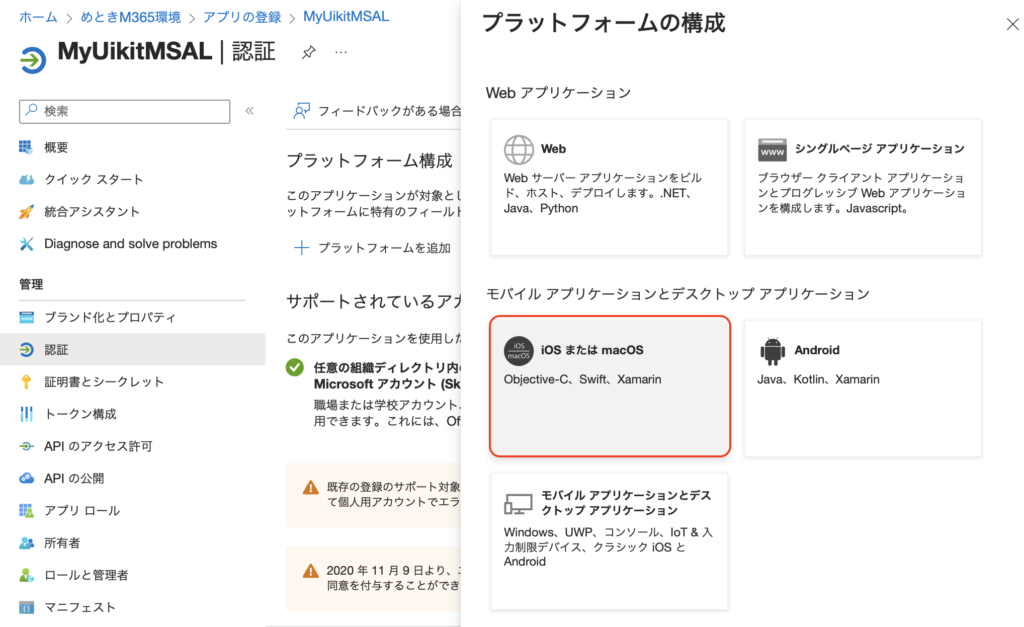
「iOS または macOS」をクリックします。
バンドルIDを入力し、「構成」をクリックします。
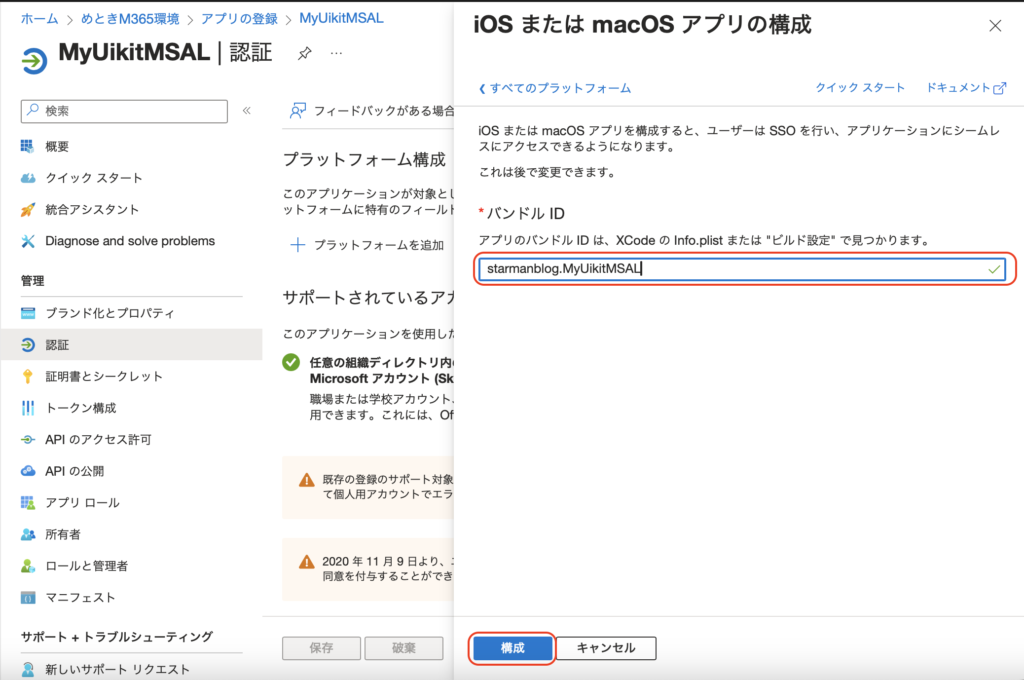
バンドルIDは Xcodeで確認します。
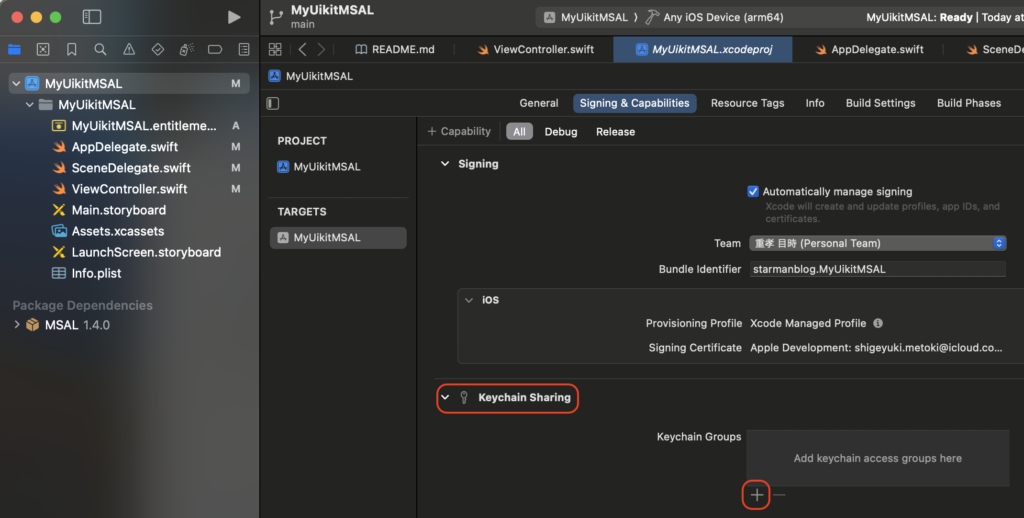
プロジェクトのTARGETSを選択し、Signing & Capabilities を選択すると、Bundle Identifierが表示されます。
これがバンドルIDです。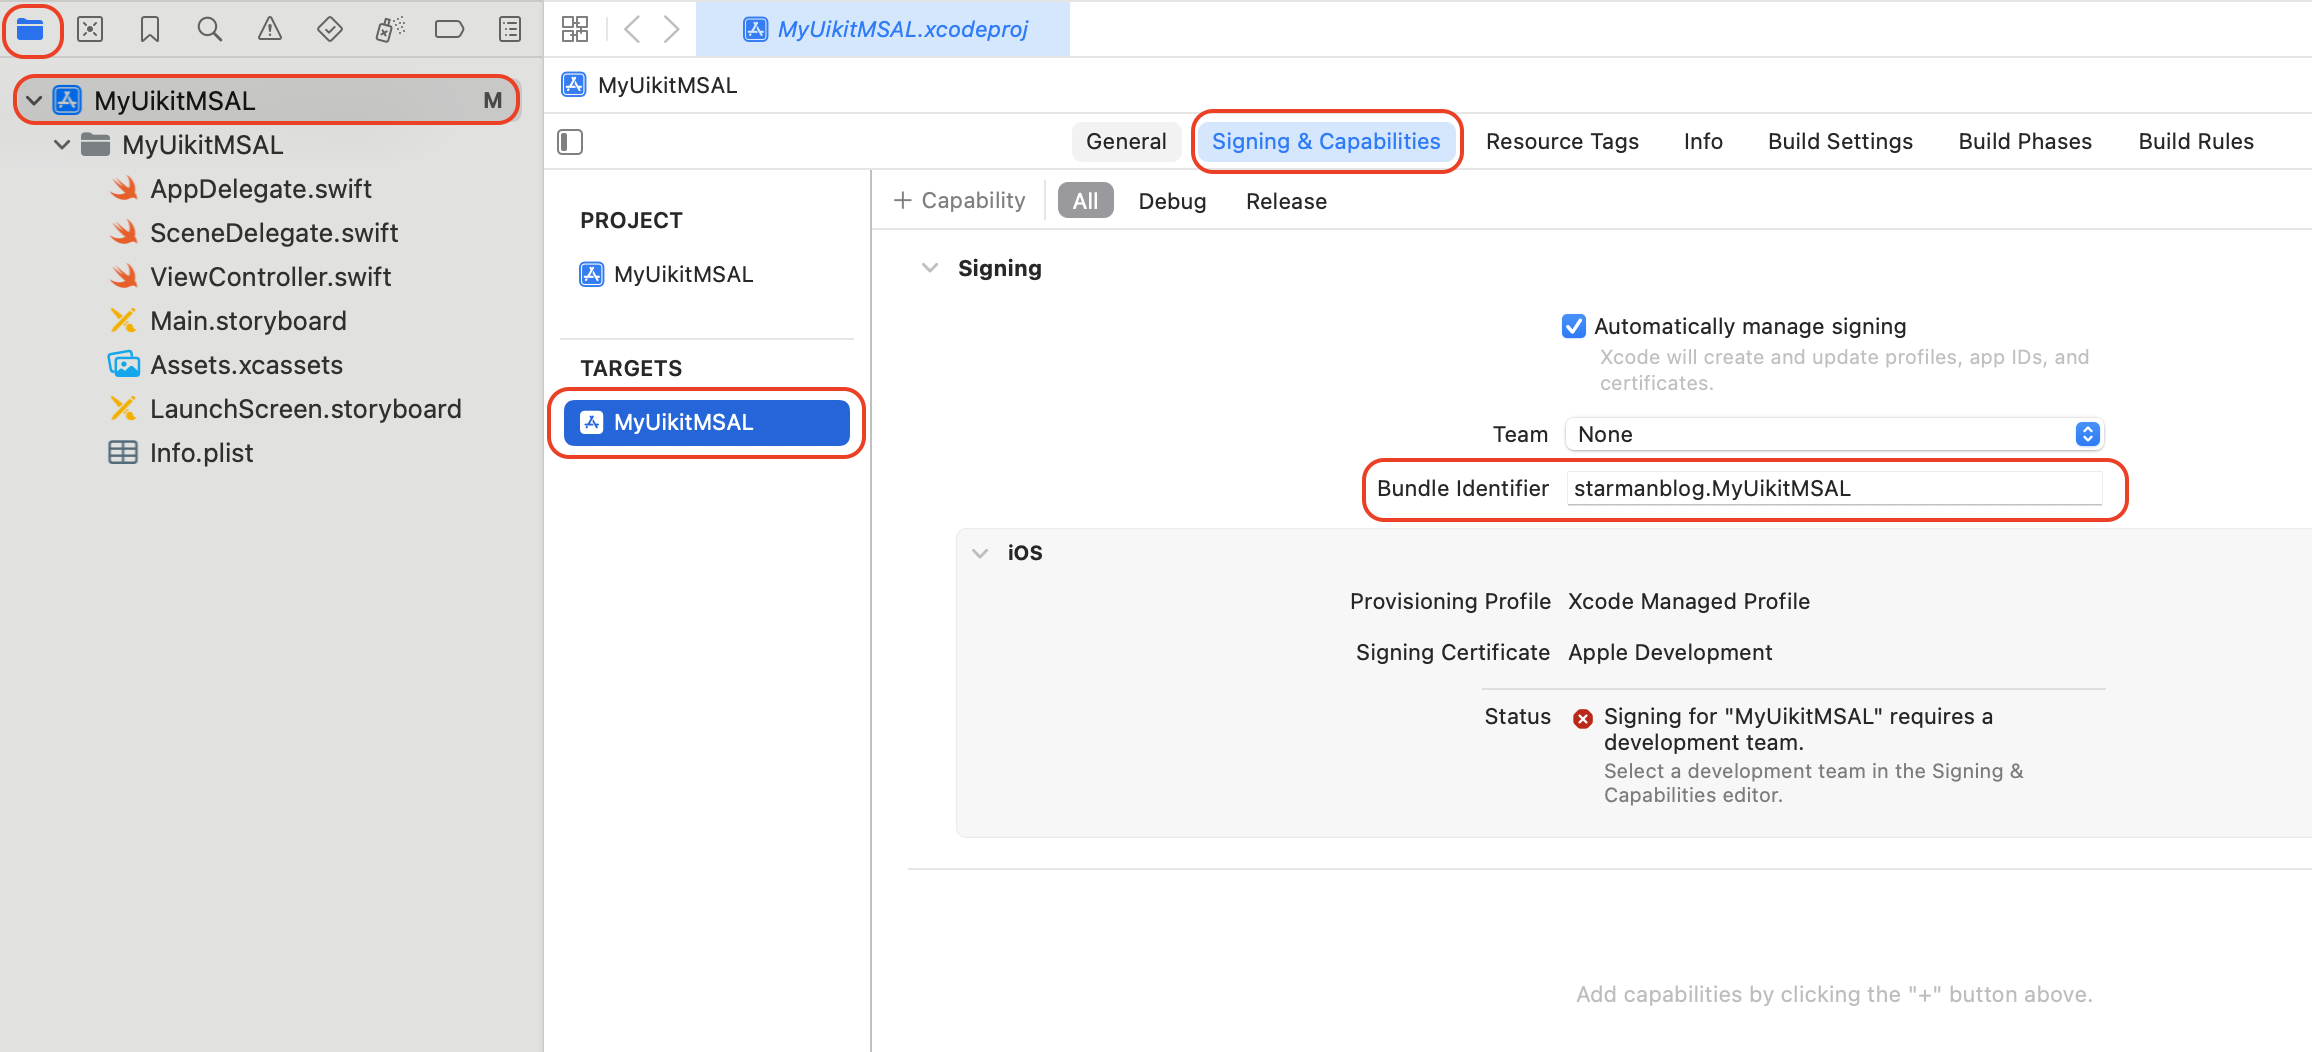
構成が完了すると、MSAL構成が表示されます。こちらの値をXcodeのプログラムに埋め込みますので、メモ帳にコピーするか、このページを開いたままにしておきましょう。
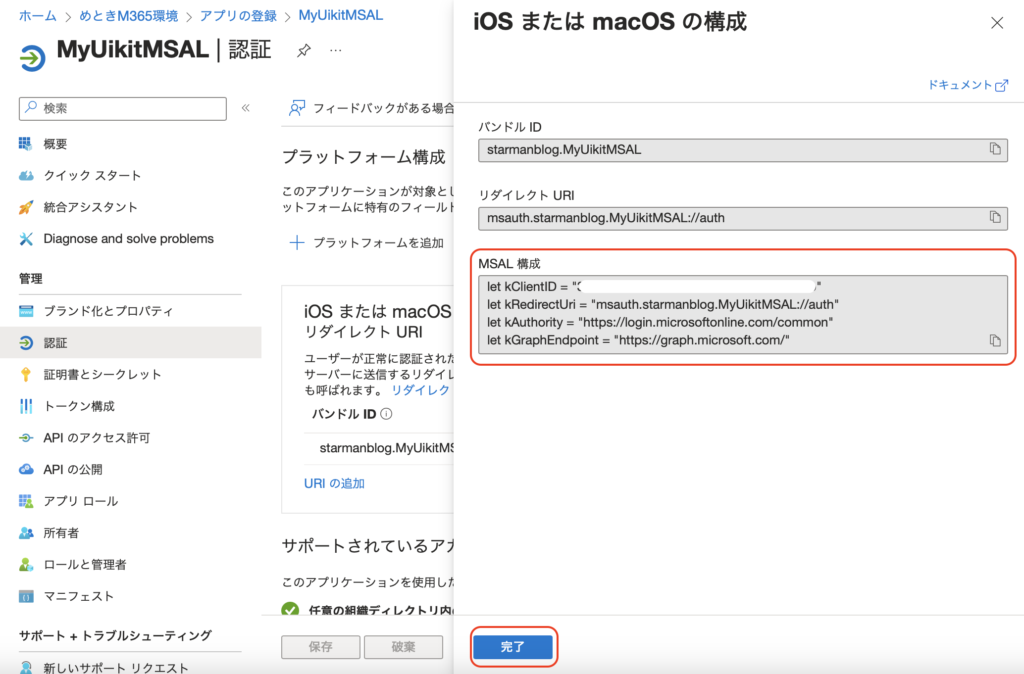
これでM365 Entra IDへのアプリ登録は完了です。
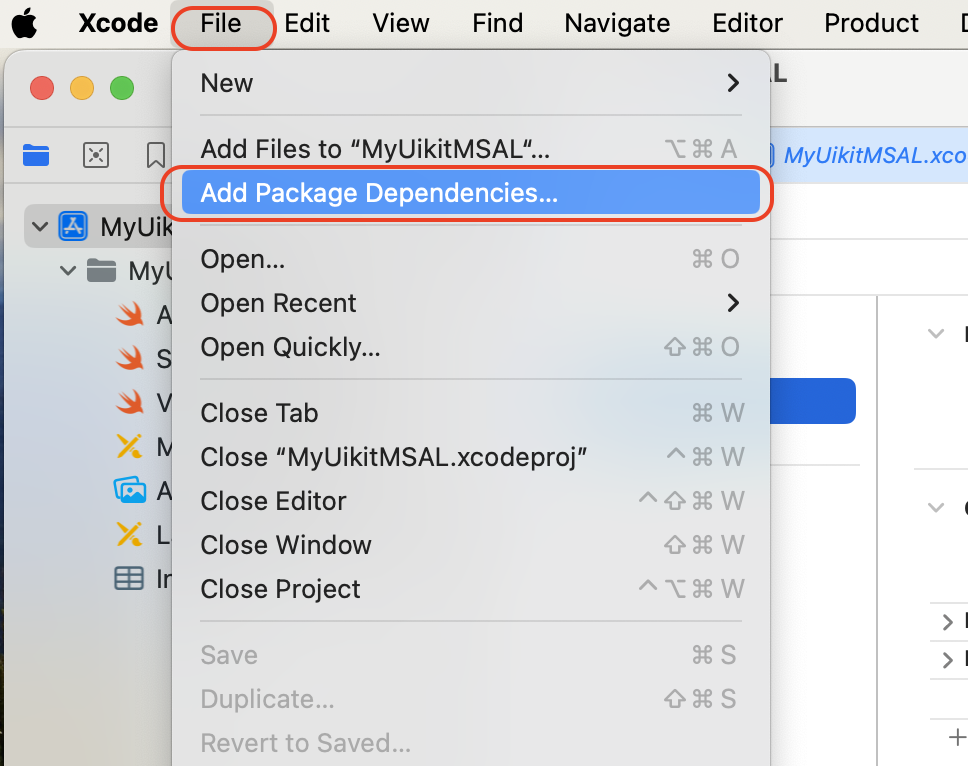
XcodeにMSALフレームワークを追加する方法として、ここではXcodeのAdd Package Dependenciesを利用する方法で行っています。他の方法として、CocoaPods、Carthageを利用する方法があります。
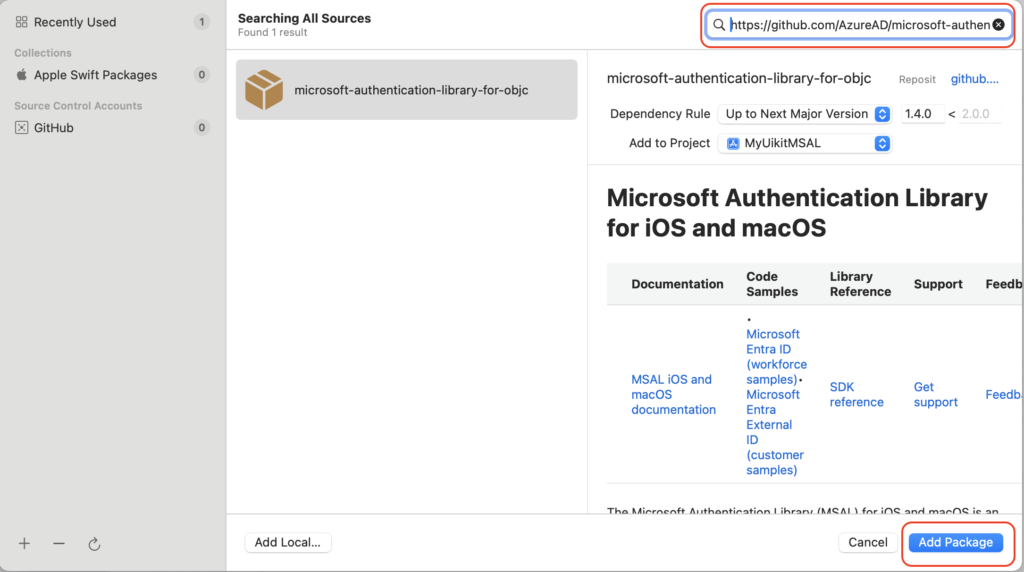
Fileメニューから「Add Package Dependencies」を選択します。
右上にURL「https://github.com/AzureAD/microsoft-authentication-library-for-objc」を入力します。
Microsoft Authentication Libraryが表示されますので、「Add Package」をクリックします。
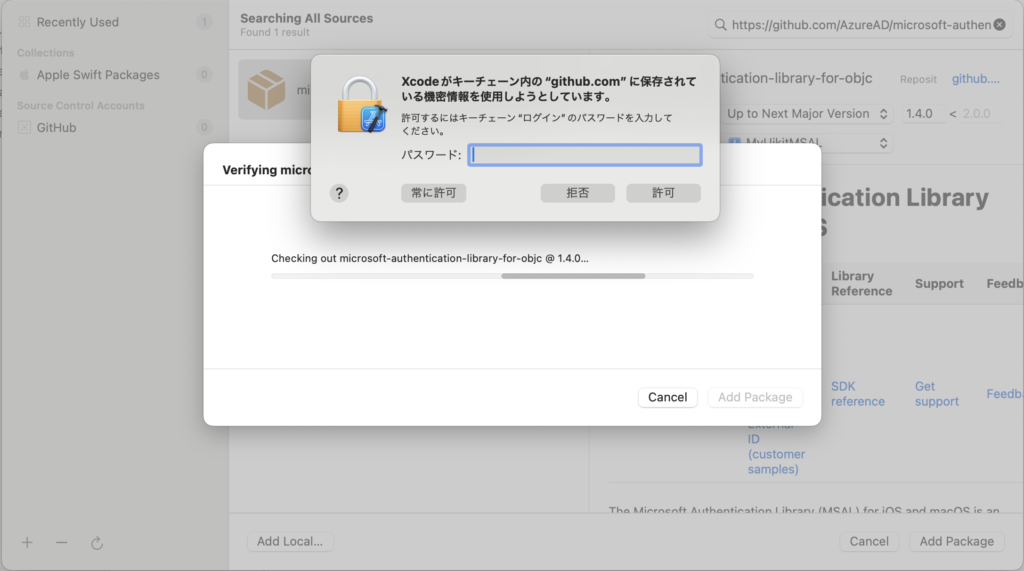
パッケージのインストールが始まります。途中、パスワードを聞かれたら、PCにログインしているパスワードを入力します。
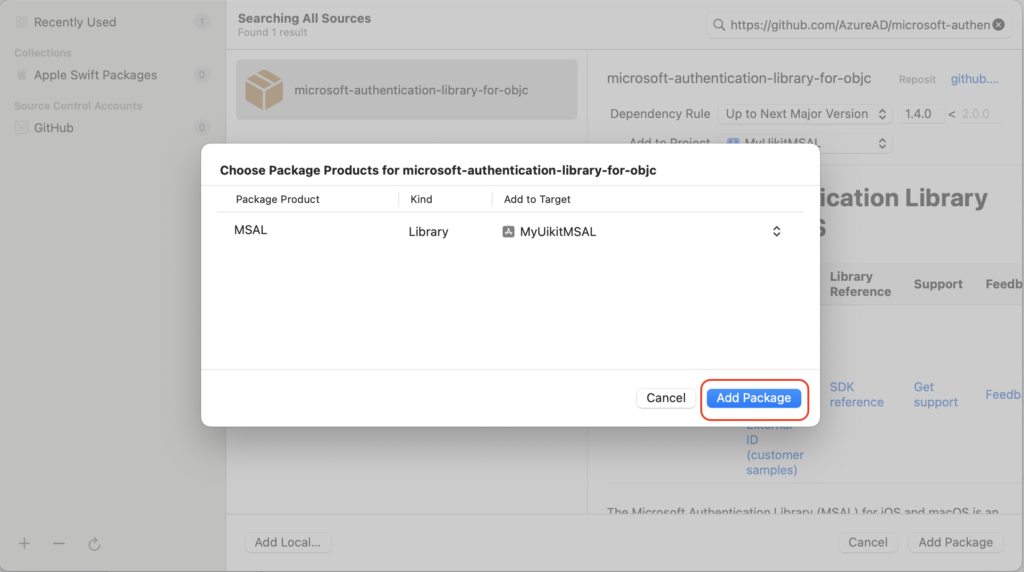
「Add Package」をクリックします。
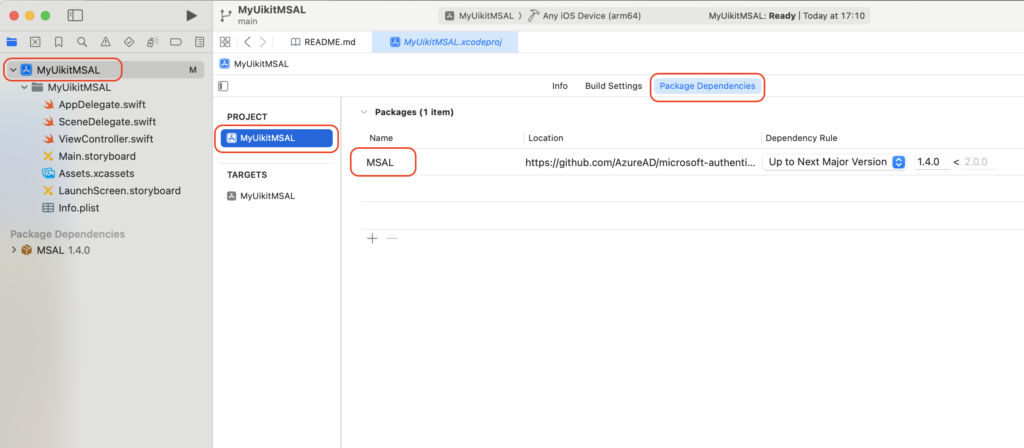
MSALパッケージが追加されました。Xcodeのプロジェクト上でMSALが追加されたことを確認できます。
ViewController.swift、 AppDelegate.swift、SceneDelegate.swiftに、import MSALを追加します。
・ViewController.swift
import UIKit
import MSAL

class ViewController: UIViewController {

    override func viewDidLoad() {
        super.viewDidLoad()
        // Do any additional setup after loading the view.
    }


}
・AppDelegate.swift
import UIKit
import MSAL

@main
class AppDelegate: UIResponder, UIApplicationDelegate {

    func application(_ application: UIApplication, didFinishLaunchingWithOptions launchOptions: [UIApplication.LaunchOptionsKey: Any]?) -> Bool {
        // Override point for customization after application launch.
        return true
    }

    // MARK: UISceneSession Lifecycle

    func application(_ application: UIApplication, configurationForConnecting connectingSceneSession: UISceneSession, options: UIScene.ConnectionOptions) -> UISceneConfiguration {
        // Called when a new scene session is being created.
        // Use this method to select a configuration to create the new scene with.
        return UISceneConfiguration(name: "Default Configuration", sessionRole: connectingSceneSession.role)
    }

    func application(_ application: UIApplication, didDiscardSceneSessions sceneSessions: Set<UISceneSession>) {
        // Called when the user discards a scene session.
        // If any sessions were discarded while the application was not running, this will be called shortly after application:didFinishLaunchingWithOptions.
        // Use this method to release any resources that were specific to the discarded scenes, as they will not return.
    }


}
・SceneDelegate.swift
import UIKit
import MSAL

class SceneDelegate: UIResponder, UIWindowSceneDelegate {

    var window: UIWindow?


    func scene(_ scene: UIScene, willConnectTo session: UISceneSession, options connectionOptions: UIScene.ConnectionOptions) {
        // Use this method to optionally configure and attach the UIWindow `window` to the provided UIWindowScene `scene`.
        // If using a storyboard, the `window` property will automatically be initialized and attached to the scene.
        // This delegate does not imply the connecting scene or session are new (see `application:configurationForConnectingSceneSession` instead).
        guard let _ = (scene as? UIWindowScene) else { return }
    }

    func sceneDidDisconnect(_ scene: UIScene) {
        // Called as the scene is being released by the system.
        // This occurs shortly after the scene enters the background, or when its session is discarded.
        // Release any resources associated with this scene that can be re-created the next time the scene connects.
        // The scene may re-connect later, as its session was not necessarily discarded (see `application:didDiscardSceneSessions` instead).
    }

    func sceneDidBecomeActive(_ scene: UIScene) {
        // Called when the scene has moved from an inactive state to an active state.
        // Use this method to restart any tasks that were paused (or not yet started) when the scene was inactive.
    }

    func sceneWillResignActive(_ scene: UIScene) {
        // Called when the scene will move from an active state to an inactive state.
        // This may occur due to temporary interruptions (ex. an incoming phone call).
    }

    func sceneWillEnterForeground(_ scene: UIScene) {
        // Called as the scene transitions from the background to the foreground.
        // Use this method to undo the changes made on entering the background.
    }

    func sceneDidEnterBackground(_ scene: UIScene) {
        // Called as the scene transitions from the foreground to the background.
        // Use this method to save data, release shared resources, and store enough scene-specific state information
        // to restore the scene back to its current state.
    }

}
ViewController.swift に MSAL構成を追加します。MSAL構成は、M365にアプリケーション登録し、プラットフォーム追加した際の情報です。
・ViewController.swift
import UIKit
import MSAL

class ViewController: UIViewController {
    // Update the below to your client ID. The below is for running the demo only
    let kClientID = "ここにあなたのクライアントIDを記載"
    let kGraphEndpoint = "https://graph.microsoft.com/" // the Microsoft Graph endpoint
    let kAuthority = "https://login.microsoftonline.com/common" // this authority allows a personal Microsoft account and a work or school account in any organization's Azure AD tenant to sign in

    let kScopes: [String] = ["user.read"] // request permission to read the profile of the signed-in user

    var accessToken = String()
    var applicationContext : MSALPublicClientApplication?
    var webViewParameters : MSALWebviewParameters?
    var currentAccount: MSALAccount?
    let kRedirectUri = "msauth.starmanblog.MyUikitMSAL://auth"

    override func viewDidLoad() {
        super.viewDidLoad()
        // Do any additional setup after loading the view.
    }

}
Xcodeのキーチェイングループに com.microsoft.adalcache を追加します。
TARGETS、Signing&Capabilitiesを選択し、「Capability」をクリックします。

表示されたCapabilitiesの中から、「Keychain Sharing」をダブルクリックします。
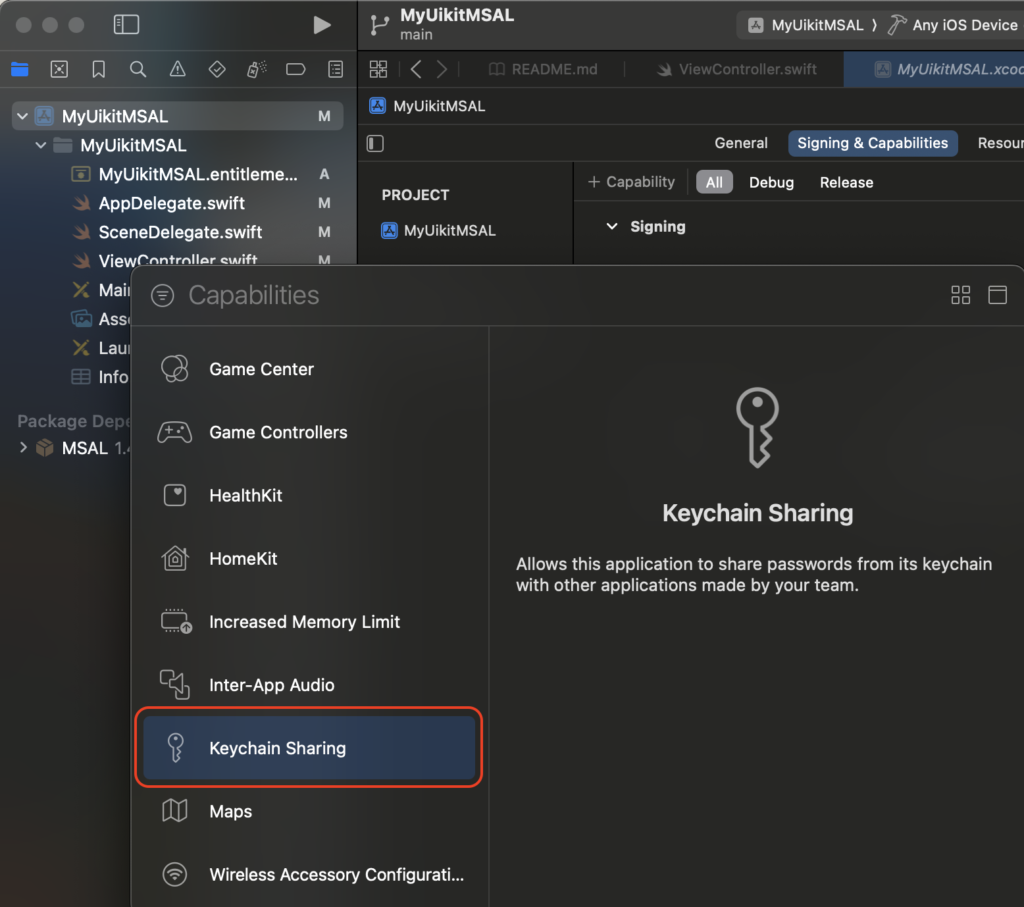
Keychain Sharingが追加されます。「+」をクリックします。
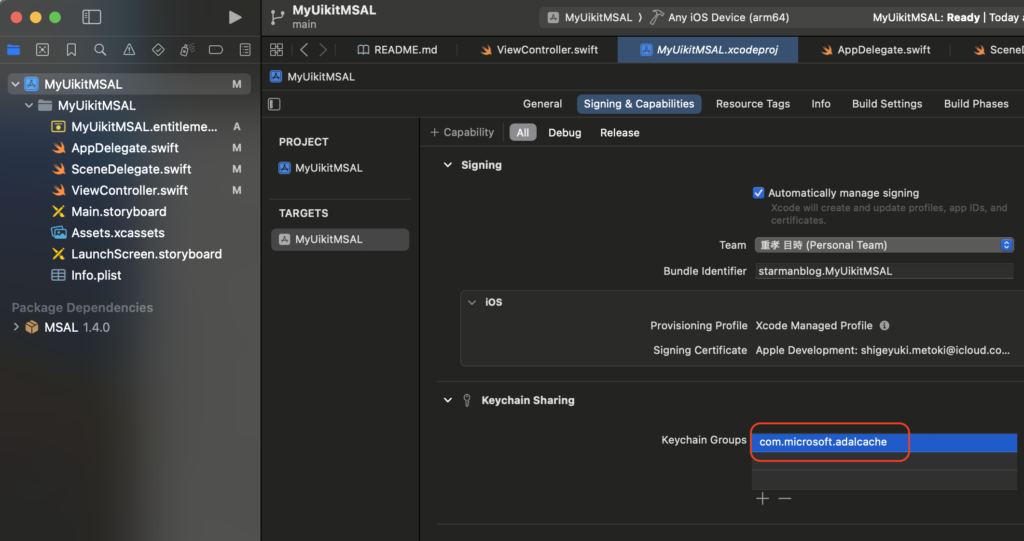
Keychain Groupsに「com.microsoft.adalcache」を追加します。
info.plistにMSAL認証で必要な記載を追加します。
info.plistファイルは、Xcodeでプロジェクトを作成する際に、InterfaceにStoryboardを選択した際に、自動的に作成されています。
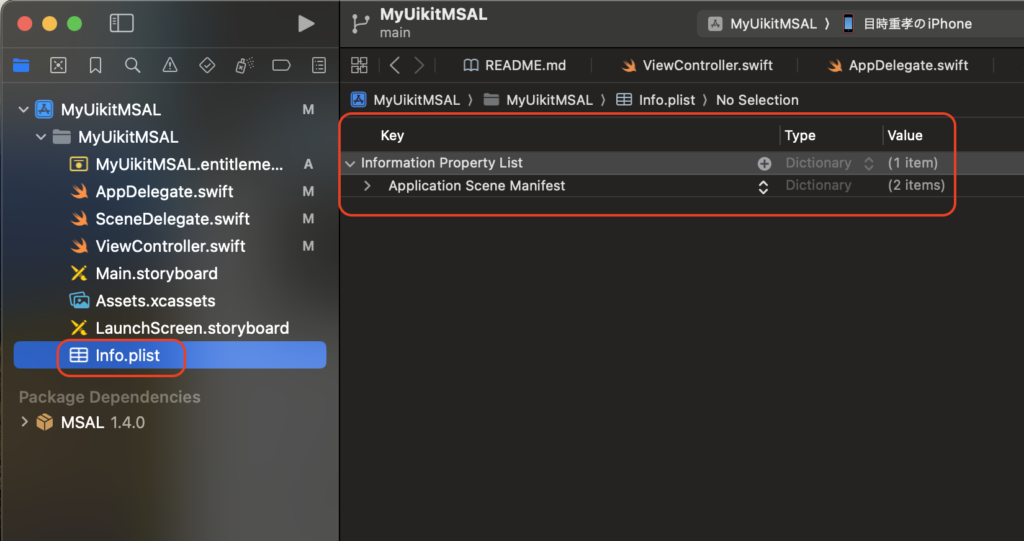
最初プロパティ値で表示されています。XMLで記載を追加するため、ソースコード表示にします。
info.plistを右クリックし、Open Asから「Source Code」を選択します。
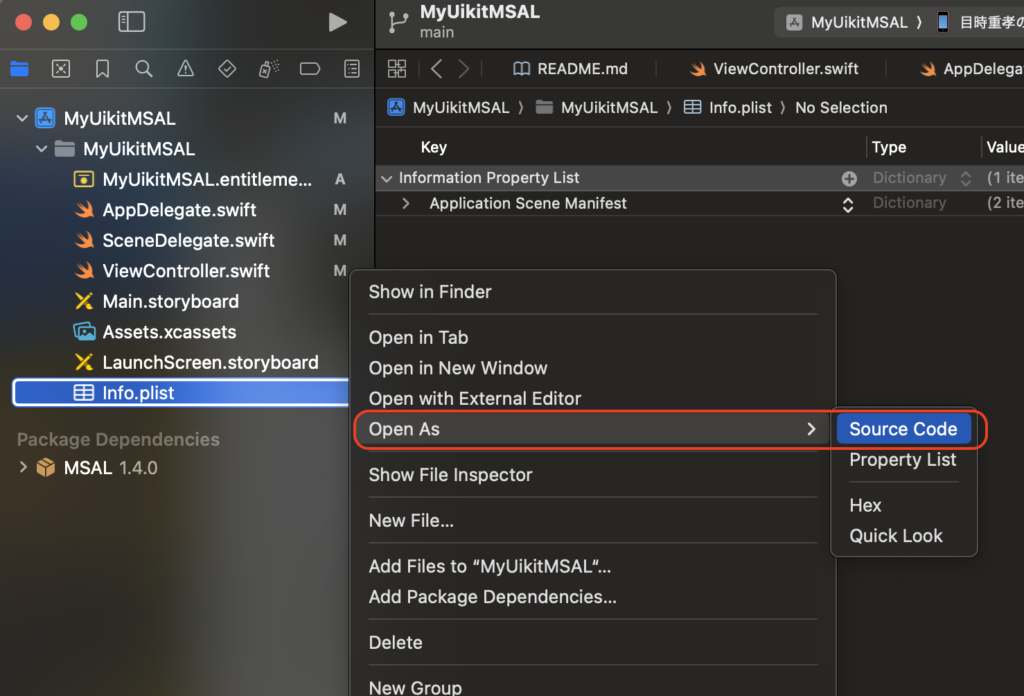
XML表記で表示されました。
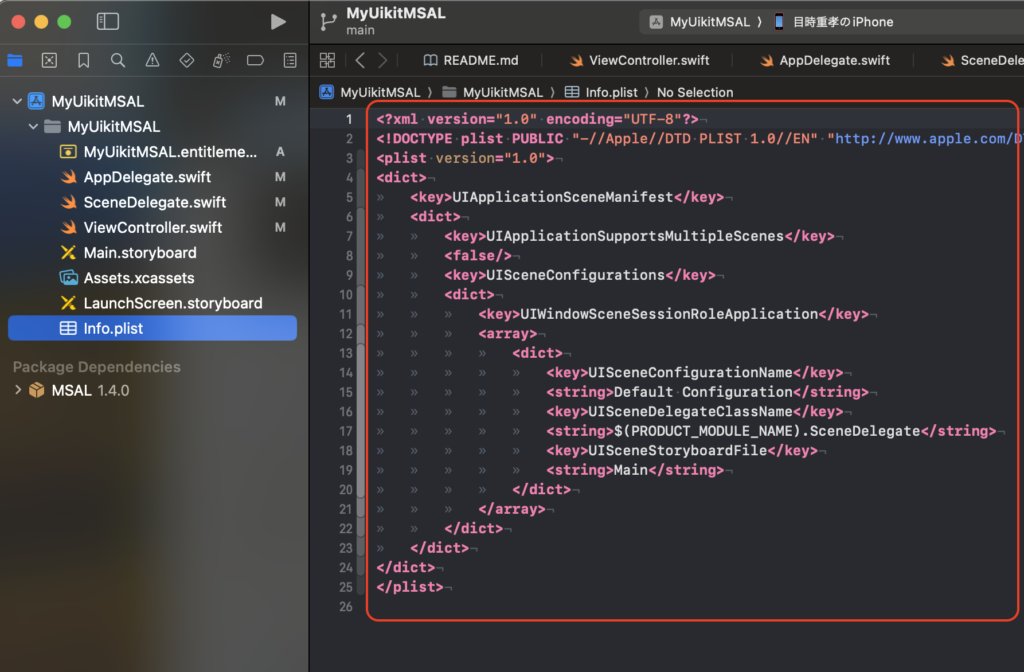
赤枠の部分に記載を追加します。
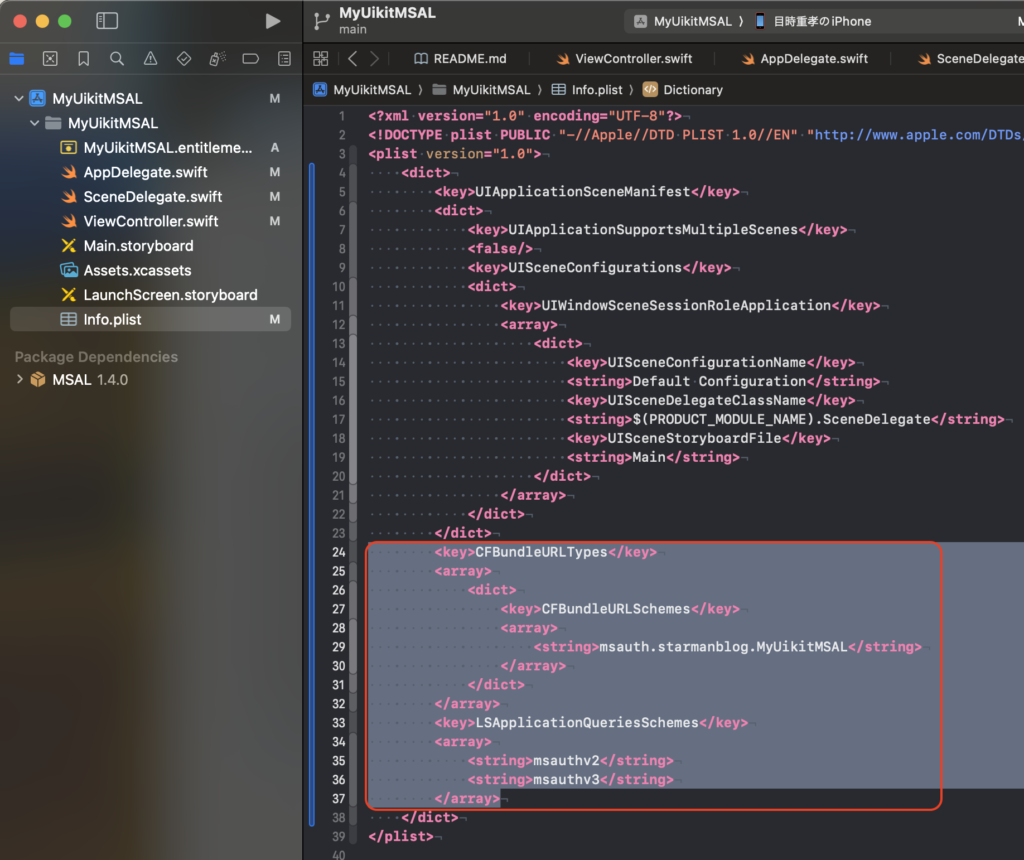
info.plistは次のようになります。黄色の線の部分が追加したところです。
「msauth.starmanblog.MyUikitMSAL」の部分を自分のバンドルIDを記載します。
<?xml version="1.0" encoding="UTF-8"?>
<!DOCTYPE plist PUBLIC "-//Apple//DTD PLIST 1.0//EN" "http://www.apple.com/DTDs/PropertyList-1.0.dtd">
<plist version="1.0">
    <dict>
        <key>UIApplicationSceneManifest</key>
        <dict>
            <key>UIApplicationSupportsMultipleScenes</key>
            <false/>
            <key>UISceneConfigurations</key>
            <dict>
                <key>UIWindowSceneSessionRoleApplication</key>
                <array>
                    <dict>
                        <key>UISceneConfigurationName</key>
                        <string>Default Configuration</string>
                        <key>UISceneDelegateClassName</key>
                        <string>$(PRODUCT_MODULE_NAME).SceneDelegate</string>
                        <key>UISceneStoryboardFile</key>
                        <string>Main</string>
                    </dict>
                </array>
            </dict>
        </dict>
        <key>CFBundleURLTypes</key>
        <array>
            <dict>
                <key>CFBundleURLSchemes</key>
                <array>
                    <string>msauth.starmanblog.MyUikitMSAL</string>
                </array>
            </dict>
        </array>
        <key>LSApplicationQueriesSchemes</key>
        <array>
            <string>msauthv2</string>
            <string>msauthv3</string>
        </array>
    </dict>
</plist>
このあとは、チュートリアルに沿って、ViewController.swift、AppDelegate.swift、SceneDelegate.swiftに記載を追加します。
具体的には、チュートリアルの次のトピックに書かれている内容です。
- アプリの UI の作成
- MSAL の使用
- サインイン コールバックを処理する (iOS のみ)
- トークンの取得
- 対話形式でのユーザー トークンの取得
- トークンの自動取得
- Microsoft Graph API を呼び出す
- サインアウトに MSAL を使用する
- ヘルパー メソッドの追加
- iOS の場合のみ: 追加のデバイス情報を取得する
完成するViewController.swift、AppDelegate.swift、SceneDelegate.swiftは次のようになります。
・ViewController.swift
import UIKit
import MSAL

class ViewController: UIViewController {
    // Update the below to your client ID. The below is for running the demo only
    let kClientID = "ここにあなたのクライアントIDを記載"
    let kGraphEndpoint = "https://graph.microsoft.com/" // the Microsoft Graph endpoint
    let kAuthority = "https://login.microsoftonline.com/common" // this authority allows a personal Microsoft account and a work or school account in any organization's Azure AD tenant to sign in

    let kScopes: [String] = ["user.read"] // request permission to read the profile of the signed-in user

    var accessToken = String()
    var applicationContext : MSALPublicClientApplication?
    var webViewParameters : MSALWebviewParameters?
    var currentAccount: MSALAccount?
    let kRedirectUri = "msauth.starmanblog.MyUikitMSAL://auth"

    override func viewDidLoad() {
        super.viewDidLoad()

        initUI()

        do {
            try self.initMSAL()
        } catch let error {
            self.updateLogging(text: "Unable to create Application Context \(error)")
        }

        self.loadCurrentAccount()
        self.platformViewDidLoadSetup()
    }

    var loggingText: UITextView!
    var signOutButton: UIButton!
    var callGraphButton: UIButton!
    var usernameLabel: UILabel!

    func initUI() {

        usernameLabel = UILabel()
        usernameLabel.translatesAutoresizingMaskIntoConstraints = false
        usernameLabel.text = ""
        usernameLabel.textColor = .darkGray
        usernameLabel.textAlignment = .right

        self.view.addSubview(usernameLabel)

        usernameLabel.topAnchor.constraint(equalTo: view.topAnchor, constant: 50.0).isActive = true
        usernameLabel.rightAnchor.constraint(equalTo: view.rightAnchor, constant: -10.0).isActive = true
        usernameLabel.widthAnchor.constraint(equalToConstant: 300.0).isActive = true
        usernameLabel.heightAnchor.constraint(equalToConstant: 50.0).isActive = true

        // Add call Graph button
        callGraphButton  = UIButton()
        callGraphButton.translatesAutoresizingMaskIntoConstraints = false
        callGraphButton.setTitle("Call Microsoft Graph API", for: .normal)
        callGraphButton.setTitleColor(.blue, for: .normal)
        callGraphButton.addTarget(self, action: #selector(callGraphAPI(_:)), for: .touchUpInside)
        self.view.addSubview(callGraphButton)

        callGraphButton.centerXAnchor.constraint(equalTo: view.centerXAnchor).isActive = true
        callGraphButton.topAnchor.constraint(equalTo: view.topAnchor, constant: 120.0).isActive = true
        callGraphButton.widthAnchor.constraint(equalToConstant: 300.0).isActive = true
        callGraphButton.heightAnchor.constraint(equalToConstant: 50.0).isActive = true

        // Add sign out button
        signOutButton = UIButton()
        signOutButton.translatesAutoresizingMaskIntoConstraints = false
        signOutButton.setTitle("Sign Out", for: .normal)
        signOutButton.setTitleColor(.blue, for: .normal)
        signOutButton.setTitleColor(.gray, for: .disabled)
        signOutButton.addTarget(self, action: #selector(signOut(_:)), for: .touchUpInside)
        self.view.addSubview(signOutButton)

        signOutButton.centerXAnchor.constraint(equalTo: view.centerXAnchor).isActive = true
        signOutButton.topAnchor.constraint(equalTo: callGraphButton.bottomAnchor, constant: 10.0).isActive = true
        signOutButton.widthAnchor.constraint(equalToConstant: 150.0).isActive = true
        signOutButton.heightAnchor.constraint(equalToConstant: 50.0).isActive = true

        let deviceModeButton = UIButton()
        deviceModeButton.translatesAutoresizingMaskIntoConstraints = false
        deviceModeButton.setTitle("Get device info", for: .normal);
        deviceModeButton.setTitleColor(.blue, for: .normal);
        deviceModeButton.addTarget(self, action: #selector(getDeviceMode(_:)), for: .touchUpInside)
        self.view.addSubview(deviceModeButton)

        deviceModeButton.centerXAnchor.constraint(equalTo: view.centerXAnchor).isActive = true
        deviceModeButton.topAnchor.constraint(equalTo: signOutButton.bottomAnchor, constant: 10.0).isActive = true
        deviceModeButton.widthAnchor.constraint(equalToConstant: 150.0).isActive = true
        deviceModeButton.heightAnchor.constraint(equalToConstant: 50.0).isActive = true

        // Add logging textfield
        loggingText = UITextView()
        loggingText.isUserInteractionEnabled = false
        loggingText.translatesAutoresizingMaskIntoConstraints = false

        self.view.addSubview(loggingText)

        loggingText.topAnchor.constraint(equalTo: deviceModeButton.bottomAnchor, constant: 10.0).isActive = true
        loggingText.leftAnchor.constraint(equalTo: self.view.leftAnchor, constant: 10.0).isActive = true
        loggingText.rightAnchor.constraint(equalTo: self.view.rightAnchor, constant: -10.0).isActive = true
        loggingText.bottomAnchor.constraint(equalTo: self.view.bottomAnchor, constant: 10.0).isActive = true
    }

    func platformViewDidLoadSetup() {

        NotificationCenter.default.addObserver(self,
                                               selector: #selector(appCameToForeGround(notification:)),
                                               name: UIApplication.willEnterForegroundNotification,
                                               object: nil)

    }

    @objc func appCameToForeGround(notification: Notification) {
        self.loadCurrentAccount()
    }

    func initMSAL() throws {

        guard let authorityURL = URL(string: kAuthority) else {
            self.updateLogging(text: "Unable to create authority URL")
            return
        }

        let authority = try MSALAADAuthority(url: authorityURL)

        let msalConfiguration = MSALPublicClientApplicationConfig(clientId: kClientID, redirectUri: nil, authority: authority)
        self.applicationContext = try MSALPublicClientApplication(configuration: msalConfiguration)
        self.initWebViewParams()
    }

    func initWebViewParams() {
        self.webViewParameters = MSALWebviewParameters(authPresentationViewController: self)
    }

    func getGraphEndpoint() -> String {
        return kGraphEndpoint.hasSuffix("/") ? (kGraphEndpoint + "v1.0/me/") : (kGraphEndpoint + "/v1.0/me/");
    }

    @objc func callGraphAPI(_ sender: AnyObject) {

        self.loadCurrentAccount { (account) in

            guard let currentAccount = account else {

                // We check to see if we have a current logged in account.
                // If we don't, then we need to sign someone in.
                self.acquireTokenInteractively()
                return
            }

            self.acquireTokenSilently(currentAccount)
        }
    }

    typealias AccountCompletion = (MSALAccount?) -> Void

    func loadCurrentAccount(completion: AccountCompletion? = nil) {

        guard let applicationContext = self.applicationContext else { return }

        let msalParameters = MSALParameters()
        msalParameters.completionBlockQueue = DispatchQueue.main

        applicationContext.getCurrentAccount(with: msalParameters, completionBlock: { (currentAccount, previousAccount, error) in

            if let error = error {
                self.updateLogging(text: "Couldn't query current account with error: \(error)")
                return
            }

            if let currentAccount = currentAccount {

                self.updateLogging(text: "Found a signed in account \(String(describing: currentAccount.username)). Updating data for that account...")

                self.updateCurrentAccount(account: currentAccount)

                if let completion = completion {
                    completion(self.currentAccount)
                }

                return
            }

            self.updateLogging(text: "Account signed out. Updating UX")
            self.accessToken = ""
            self.updateCurrentAccount(account: nil)

            if let completion = completion {
                completion(nil)
            }
        })
    }

    func acquireTokenInteractively() {

        guard let applicationContext = self.applicationContext else { return }
        guard let webViewParameters = self.webViewParameters else { return }

        // #1
        let parameters = MSALInteractiveTokenParameters(scopes: kScopes, webviewParameters: webViewParameters)
        parameters.promptType = .selectAccount

        // #2
        applicationContext.acquireToken(with: parameters) { (result, error) in

            // #3
            if let error = error {

                self.updateLogging(text: "Could not acquire token: \(error)")
                return
            }

            guard let result = result else {

                self.updateLogging(text: "Could not acquire token: No result returned")
                return
            }

            // #4
            self.accessToken = result.accessToken
            self.updateLogging(text: "Access token is \(self.accessToken)")
            self.updateCurrentAccount(account: result.account)
            self.getContentWithToken()
        }
    }

    func acquireTokenSilently(_ account : MSALAccount!) {

        guard let applicationContext = self.applicationContext else { return }

        /**

         Acquire a token for an existing account silently

         - forScopes:           Permissions you want included in the access token received
         in the result in the completionBlock. Not all scopes are
         guaranteed to be included in the access token returned.
         - account:             An account object that we retrieved from the application object before that the
         authentication flow will be locked down to.
         - completionBlock:     The completion block that will be called when the authentication
         flow completes, or encounters an error.
         */

        let parameters = MSALSilentTokenParameters(scopes: kScopes, account: account)

        applicationContext.acquireTokenSilent(with: parameters) { (result, error) in

            if let error = error {

                let nsError = error as NSError

                // interactionRequired means we need to ask the user to sign-in. This usually happens
                // when the user's Refresh Token is expired or if the user has changed their password
                // among other possible reasons.

                if (nsError.domain == MSALErrorDomain) {

                    if (nsError.code == MSALError.interactionRequired.rawValue) {

                        DispatchQueue.main.async {
                            self.acquireTokenInteractively()
                        }
                        return
                    }
                }

                self.updateLogging(text: "Could not acquire token silently: \(error)")
                return
            }

            guard let result = result else {

                self.updateLogging(text: "Could not acquire token: No result returned")
                return
            }

            self.accessToken = result.accessToken
            self.updateLogging(text: "Refreshed Access token is \(self.accessToken)")
            self.updateSignOutButton(enabled: true)
            self.getContentWithToken()
        }
    }

    func getContentWithToken() {

        // Specify the Graph API endpoint
        let graphURI = getGraphEndpoint()
        let url = URL(string: graphURI)
        var request = URLRequest(url: url!)

        // Set the Authorization header for the request. We use Bearer tokens, so we specify Bearer + the token we got from the result
        request.setValue("Bearer \(self.accessToken)", forHTTPHeaderField: "Authorization")

        URLSession.shared.dataTask(with: request) { data, response, error in

            if let error = error {
                self.updateLogging(text: "Couldn't get graph result: \(error)")
                return
            }

            guard let result = try? JSONSerialization.jsonObject(with: data!, options: []) else {

                self.updateLogging(text: "Couldn't deserialize result JSON")
                return
            }

            self.updateLogging(text: "Result from Graph: \(result))")

        }.resume()
    }

    @objc func signOut(_ sender: AnyObject) {

        guard let applicationContext = self.applicationContext else { return }

        guard let account = self.currentAccount else { return }

        do {

            /**
             Removes all tokens from the cache for this application for the provided account

             - account:    The account to remove from the cache
             */

            let signoutParameters = MSALSignoutParameters(webviewParameters: self.webViewParameters!)
            signoutParameters.signoutFromBrowser = false // set this to true if you also want to signout from browser or webview

            applicationContext.signout(with: account, signoutParameters: signoutParameters, completionBlock: {(success, error) in

                if let error = error {
                    self.updateLogging(text: "Couldn't sign out account with error: \(error)")
                    return
                }

                self.updateLogging(text: "Sign out completed successfully")
                self.accessToken = ""
                self.updateCurrentAccount(account: nil)
            })

        }
    }

    func updateLogging(text : String) {

        if Thread.isMainThread {
            self.loggingText.text = text
        } else {
            DispatchQueue.main.async {
                self.loggingText.text = text
            }
        }
    }

    func updateSignOutButton(enabled : Bool) {
        if Thread.isMainThread {
            self.signOutButton.isEnabled = enabled
        } else {
            DispatchQueue.main.async {
                self.signOutButton.isEnabled = enabled
            }
        }
    }

    func updateAccountLabel() {

        guard let currentAccount = self.currentAccount else {
            self.usernameLabel.text = "Signed out"
            return
        }

        self.usernameLabel.text = currentAccount.username
    }

    func updateCurrentAccount(account: MSALAccount?) {
        self.currentAccount = account
        self.updateAccountLabel()
        self.updateSignOutButton(enabled: account != nil)
    }

    @objc func getDeviceMode(_ sender: AnyObject) {

        if #available(iOS 13.0, *) {
            self.applicationContext?.getDeviceInformation(with: nil, completionBlock: { (deviceInformation, error) in

                guard let deviceInfo = deviceInformation else {
                    self.updateLogging(text: "Device info not returned. Error: \(String(describing: error))")
                    return
                }

                let isSharedDevice = deviceInfo.deviceMode == .shared
                let modeString = isSharedDevice ? "shared" : "private"
                self.updateLogging(text: "Received device info. Device is in the \(modeString) mode.")
            })
        } else {
            self.updateLogging(text: "Running on older iOS. GetDeviceInformation API is unavailable.")
        }
    }

}
・AppDelegate.swift
import UIKit
import MSAL

@main
class AppDelegate: UIResponder, UIApplicationDelegate {

    func application(_ application: UIApplication, didFinishLaunchingWithOptions launchOptions: [UIApplication.LaunchOptionsKey: Any]?) -> Bool {
        // Override point for customization after application launch.
        return true
    }

    // MARK: UISceneSession Lifecycle

    func application(_ application: UIApplication, configurationForConnecting connectingSceneSession: UISceneSession, options: UIScene.ConnectionOptions) -> UISceneConfiguration {
        // Called when a new scene session is being created.
        // Use this method to select a configuration to create the new scene with.
        return UISceneConfiguration(name: "Default Configuration", sessionRole: connectingSceneSession.role)
    }

    func application(_ application: UIApplication, didDiscardSceneSessions sceneSessions: Set<UISceneSession>) {
        // Called when the user discards a scene session.
        // If any sessions were discarded while the application was not running, this will be called shortly after application:didFinishLaunchingWithOptions.
        // Use this method to release any resources that were specific to the discarded scenes, as they will not return.
    }

    // Append for MSAL
    // Inside AppDelegate...
    func application(_ app: UIApplication, open url: URL, options: [UIApplication.OpenURLOptionsKey : Any] = [:]) -> Bool {

        return MSALPublicClientApplication.handleMSALResponse(url, sourceApplication: options[UIApplication.OpenURLOptionsKey.sourceApplication] as? String)
    }

}
・SceneDelegate.swift
import UIKit
import MSAL

class SceneDelegate: UIResponder, UIWindowSceneDelegate {

    var window: UIWindow?


    func scene(_ scene: UIScene, willConnectTo session: UISceneSession, options connectionOptions: UIScene.ConnectionOptions) {
        // Use this method to optionally configure and attach the UIWindow `window` to the provided UIWindowScene `scene`.
        // If using a storyboard, the `window` property will automatically be initialized and attached to the scene.
        // This delegate does not imply the connecting scene or session are new (see `application:configurationForConnectingSceneSession` instead).
        guard let _ = (scene as? UIWindowScene) else { return }
    }

    func sceneDidDisconnect(_ scene: UIScene) {
        // Called as the scene is being released by the system.
        // This occurs shortly after the scene enters the background, or when its session is discarded.
        // Release any resources associated with this scene that can be re-created the next time the scene connects.
        // The scene may re-connect later, as its session was not necessarily discarded (see `application:didDiscardSceneSessions` instead).
    }

    func sceneDidBecomeActive(_ scene: UIScene) {
        // Called when the scene has moved from an inactive state to an active state.
        // Use this method to restart any tasks that were paused (or not yet started) when the scene was inactive.
    }

    func sceneWillResignActive(_ scene: UIScene) {
        // Called when the scene will move from an active state to an inactive state.
        // This may occur due to temporary interruptions (ex. an incoming phone call).
    }

    func sceneWillEnterForeground(_ scene: UIScene) {
        // Called as the scene transitions from the background to the foreground.
        // Use this method to undo the changes made on entering the background.
    }

    func sceneDidEnterBackground(_ scene: UIScene) {
        // Called as the scene transitions from the foreground to the background.
        // Use this method to save data, release shared resources, and store enough scene-specific state information
        // to restore the scene back to its current state.
    }

    // Append for MSAL
    func scene(_ scene: UIScene, openURLContexts URLContexts: Set<UIOpenURLContext>) {

        guard let urlContext = URLContexts.first else {
            return
        }

        let url = urlContext.url
        let sourceApp = urlContext.options.sourceApplication

        MSALPublicClientApplication.handleMSALResponse(url, sourceApplication: sourceApp)
    }

}
あとはアプリを実行して、動作を確認してください。
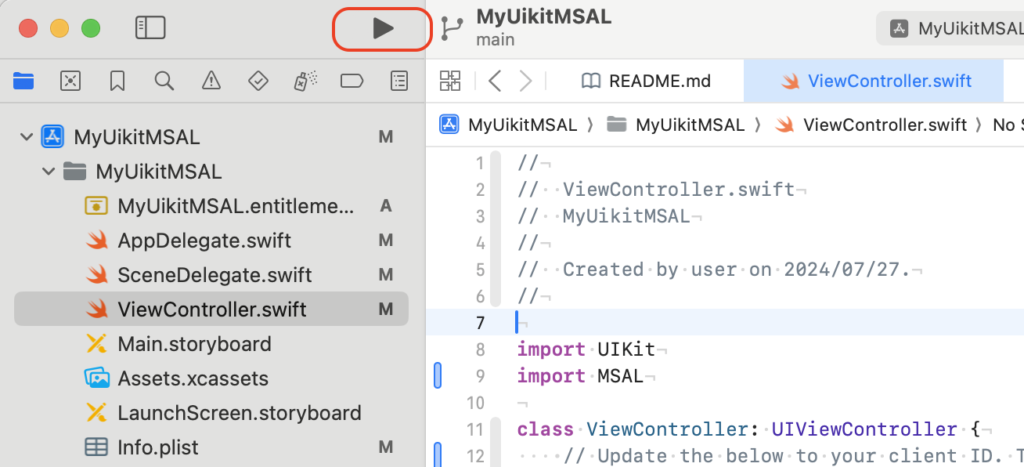
成功すると次のような画面が立ち上がります。
シミュレータで実行できたあと、手持ちのiPhoneで実行したところ、Microsoft Authenticator(Broker)との連携がうまくできずエラーになりました。こちらの記事を参考にSceneDelegateに追加したところ、動くようになりました。
チュートリアルの中のXcode11ならという記載のところだったので、コードに追加していなかったことが原因でした。
上で紹介したコードには、すでに入っていますので、大丈夫です。
次は、uikitにかわり、swift ui で実行できるといいなと考えとります。それでは。